Digi-Sign, The Certificate Corporation
Published on Digi-Sign, The Certificate Corporation (http://www2.digi-sign.com)

Home > Support > Digi-SSL™ > Digi-SSL™ Certificates

By Digi-Sign
Created Feb 18 2008 - 14:07

Digi-SSL™ Certificates

Custom Breadcrumb: 
<a href="/">Home</a> › <a href="/support">Support</a> › Digi-SSL&trade;
Digi-SSL™ Support

This is the main Digi-SSL™ Support page and provides all the main support pages you require to own and use your Digi-SSL™ Certificates.

Important Note:

Effective 1 January 2011, we will no longer support any Certificate Signing Request [CSR] generated with a 1024 bit key. This is because NIST, PKIX, WebTrust and other respective security standards no longer consider the 1024 bit key size as secure. Read more > [1]

Digi-SSL™ Support Search Facility

You can browse this Support Directory or you can view the Digi-SSL™ KnowledgeBase [2] that contains specific Questions & Answers [Q&A](this is free today but will be a 'Subscription Only' service soon).

Alternatively, you may wish to search all of the Digi-SSL™ pages using the search facility below.


Search all Digi-SSL™ pages   


You can return 'Up' to the main Support section of the entire site or continue browsing by using the links below. And remember, to get the most extensive help file access and or to contribute, Login [3] or Register [4].

CSR Generation

Important Note:

Effective 1 January 2011, we will no longer support any Certificate Signing Request [CSR] generated with a 1024 bit key. This is because NIST, PKIX, WebTrust and other respective security standards no longer consider the 1024 bit key size as secure. Read more > [1]

How to generate a Certificate Signing Request [CSR] on a server

The first part of enrolling for your Digi-SSL™ [5] Certificate is to generate a Certificate Signing Request [CSR]. CSR generation is wholly dependent on the software you use on your webserver. Select your webserver software from the list below after reading the following general points:

General Points to remember before creating your CSR

The Common Name field should be the Fully Qualified Domain Name [FQDN] or the web address for which you plan to use your Certificate, e.g. the area of your site you wish customers to connect to using SSL. For example, a Digi-SSL™ Certificate issued for digi-sign.com will not be valid for secure.digi-sign.com. If the web address to be used for SSL is secure.digi-sign.com, ensure that the common name submitted in the CSR is secure.digi-sign.com

If your webserver software does not appear on the list, please contact support [6] with full details of your webserver software and we will contact you with further instructions.


Apache Mod_SSL

Important Note:

Effective 1 January 2011, we will no longer support any Certificate Signing Request [CSR] generated with a 1024 bit key. This is because NIST, PKIX, WebTrust and other respective security standards no longer consider the 1024 bit key size as secure. Read more > [1]

Instructions

Step-by-Step Instructions

A CSR is a file containing your certificate application information, including your Public Key. Generate your CSR and then copy and paste the CSR file into the web form in the enrollment process:

Generate keys and certificate:

To generate a pair of private key and public Certificate Signing Request (CSR) for a webserver, replace "server" below and "myserver" with the total hostname you are using in the following command:

    openssl req -new -newkey rsa:2048 -keyout myserver.key -nodes -out server.csr


This creates two files. The file myserver.key contains a private key; do not disclose this file to anyone. Carefully protect the private key.

In particular, be sure to backup the private key, as there is no means to recover it should it be lost. The private key is used as input in the command to generate a Certificate Signing Request (CSR).

You will now be asked to enter details to be entered into your CSR.

What you are about to enter is what is called a Distinguished Name or a DN.

For some fields there will be a default value, If you enter '.', the field will be left blank.

    -----
    Country Name (2 letter code) [AU]: GB
    State or Province Name (full name) [Some-State]: York
    Locality Name (eg, city) []: York
    Organization Name (eg, company) [Internet Widgits Pty Ltd]: MyCompany Ltd
    Organizational Unit Name (eg, section) []: IT
    Common Name (eg, YOUR name) []: mysubdomain.mydomain.com
    Email Address []:

    Please enter the following 'extra' attributes to be sent with your certificate request
    A challenge password []:
    An optional company name []:
    -----


Use the name of the web server as Common Name (CN). If the domain name is mydomain.com append the domain to the hostname (use the fully qualified domain name).

The fields email address, optional company name and challenge password can be left blank for a web server certificate.

Your CSR will now have been created. Open the server.csr in a text editor and copy and paste the contents into the online enrollment form when requested.

OpenSSL

Important Note:

Effective 1 January 2011, we will no longer support any Certificate Signing Request [CSR] generated with a 1024 bit key. This is because NIST, PKIX, WebTrust and other respective security standards no longer consider the 1024 bit key size as secure. Read more > [1]

Instructions

Step-by-Step Instructions

A CSR is a file containing your certificate application information, including your Public Key. Generate your CSR and then copy and paste the CSR file into the web form in the enrollment process:

Generate keys and certificate:

    To generate a pair of private key and public Certificate Signing Request (CSR) for a web server, "server", use the following commands:

        256-bit Certificate:

        Openssl req -new -newkey rsa: 2048 -keyout myserver.key -nodes -out server.csr


This creates two files. The file myserver.key contains a private key; do not disclose this file to anyone. Carefully protect the private key.

In particular, be sure to backup the private key, as there is no means to recover it should it be lost. The private key is used as input in the command to generate a Certificate Signing Request (CSR).

You will now be asked to enter details to be entered into your CSR.

What you are about to enter is what is called a Distinguished Name or a DN.

For some fields there will be a default value, If you enter '.', the field will be left blank.

    -----
    Country Name (2 letter code) [AU]: GB
    State or Province Name (full name) [Some-State]: York
    Locality Name (eg, city) []: York
    Organization Name (eg, company) [Internet Widgits Pty Ltd]: MyCompany Ltd
    Organizational Unit Name (eg, section) []: IT
    Common Name (eg, YOUR name) []: mysubdomain.mydomain.com
    Email Address []:

    Please enter the following 'extra' attributes to be sent with your certificate request
    A challenge password []:
    An optional company name []:
    -----


Use the name of the web server as Common Name (CN). If the domain name is mydomain.com append the domain to the hostname (use the fully qualified domain name).

The fields email address; optional company name and challenge password can be left blank for a webserver certificate.

Your CSR will now have been created. Open the server.csr in a text editor and copy and paste the contents into the online enrollment form when requested.

Cobalt RaQ4/XTR

Important Note:

Effective 1 January 2011, we will no longer support any Certificate Signing Request [CSR] generated with a 1024 bit key. This is because NIST, PKIX, WebTrust and other respective security standards no longer consider the 1024 bit key size as secure. Read more > [1]

Instructions

To enable SSL on a virtual site:

    Go to the Server Management screen.
    Click the green icon (Wrench for RaQ4, Pencil for XTR) next to the virtual site on which you want to enable SSL. The Site Management screen appears.
    Click Site Settings on the left side.
    (Then 'General' for XTR)
    Click the check box next to Enable SSL.
    Click Save Changes.
    The RaQ4/XTR saves the configuration of the virtual site.


Generate a self-signed certificate:

    Once SSL is enabled, the user must now create a self-signed certificate. An external authority will sign the self-signed certificate later.
    Go to the Server Management screen.
    Click the green icon (Wrench for RaQ4, Pencil for XTR) next to the SSL enabled virtual site

    Click SSL Settings on the left side.

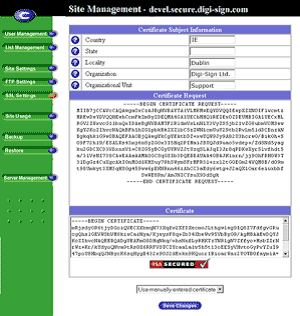
    The Certificate Subject Information table appears.


Enter the following information:

    Country Enter the two-letter country code
    State Enter the name of the state or County
    Locality Enter the city or locality
    Organization Enter the name of the organization
    Organizational Unit As an option, enter the name of a department

Select Generate self-signed certificate from the pull-down menu at the bottom.
Click Save Changes.

The RaQ4/XTR processes the information and regenerates the screen with the new self-signed certificate in the Certificate Request and Certificate windows.

IMAGE


Copy the entire contents of the certificate request, including:

    -----BEGIN CERTIFICATE REQUEST-----
    and
    -----END CERTIFICATE REQUEST-----
    for use during the purchasing process.


IMAGE


Cobalt User Guide available at:
http://www.sun.com/hardware/serverappliances/documentation/manuals.html [7]

Apache via Ensim Webppliance 3.1.x

Important Note:

Effective 1 January 2011, we will no longer support any Certificate Signing Request [CSR] generated with a 1024 bit key. This is because NIST, PKIX, WebTrust and other respective security standards no longer consider the 1024 bit key size as secure. Read more > [1]

Instructions

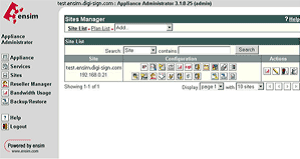
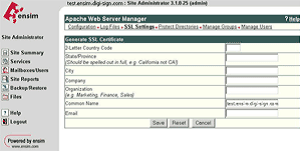
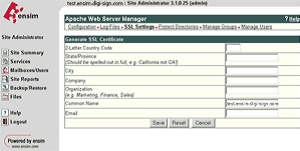
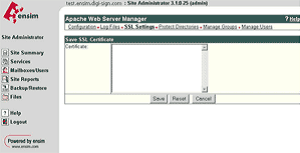
Login to the Site Administrator or Appliance Administrator and select the site to administer.

IMAGE


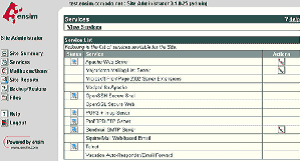
Select Services

IMAGE


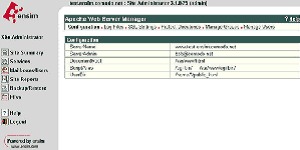
Select the Actions box next to Apache Web Server and then select SSL Settings

IMAGE


Select Generate and fill in the required details, the site name will automatically be entered into the Common Name field, ensure this is correct and contains the Fully Qualified Domain Name (e.g. secure.digi-sign.com, www.digi-sign.com [8], support.digi-sign.net

IMAGE


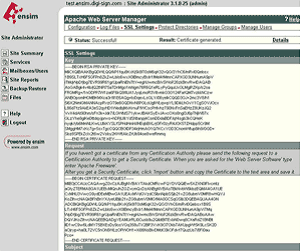
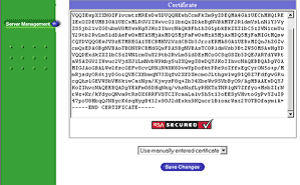
Select Save and you are presented with the RSA Key and the Certificate Request (CSR)

IMAGE


Copy the Certificate Request into a text editor; this will be required when you purchase your certificate. Do not delete this request, as it will be needed during the installation of your SSL certificate.

Stronghold Server

Important Note:

Effective 1 January 2011, we will no longer support any Certificate Signing Request [CSR] generated with a 1024 bit key. This is because NIST, PKIX, WebTrust and other respective security standards no longer consider the 1024 bit key size as secure. Read more > [1]

Instructions

NOTE: Keys and certificates are managed through three scripts: genkey, getca and genreq. These are part of the normal Stronghold distribution. Keys and certificates are stored in the directory$SSLTOP/private/, where SSLTOP is typically /usr/local/ssl.

To generate a key pair and CSR for your server:

  • Run genkey, specifying the name of the host or virtual host: genkey hostname. The genkey script displays the filenames and locations of the key file and CSR file it will generate:
    • Key file: /usr/local/www/sslhostname.key
    • CSR file: /usr/local/www/sslhostname.cert

    NOTE: If you already have a key for your server, run genreq [servername] to generate only the CSR.

  • Press Enter. The genkey script reminds you to be sure you are not overwriting an existing key pair and certificate.
  • When prompted, enter a key size in bits. It is recommended that you use the largest key size available: 2048.
  • When prompted, enter random keystrokes. Stop when the counter reaches zero and genkey beeps. This random data is used to create a unique public and private key pair.
  • When prompted, enter 'y' to create the key pair and CSR.
    • For your CA [9] select 'Other'.
    • Enter the two-letter country code for your country. You must use the correct ISO country code; other abbreviations will not be recognized. For example the correct code for the United Kingdom is GB, not UK.
    • Enter the full name of your state or province. Do not abbreviate.
    • Enter the name of your city, town, or other locality.
    • Enter the name of your organization.
    • Enter the name of your unit within the specified organization.
    • Enter your web site's fully qualified name. For example www.company.com [10]. This is also known as your site's common name.
    • When you have finished entering the CSR data, genkey automatically creates the CSR.

Back up your key file and CSR on a floppy disk and store the disk in a secure location. If you lose your private key or forget the password, you will not be able to install your certificate.

Hsphere

Important Note:

Effective 1 January 2011, we will no longer support any Certificate Signing Request [CSR] generated with a 1024 bit key. This is because NIST, PKIX, WebTrust and other respective security standards no longer consider the 1024 bit key size as secure. Read more > [1]

Instructions

1. Click SSL on your control panel home page.

2. Enable SSL for the domain in the list.

3. Click the link at the top of the form that appears.

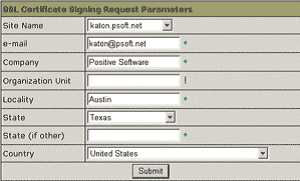
4. On the page that appears, confirm your details by clicking the Submit button:

IMAGE


These data will be used to generate the certificate. Don't make changes to the data if you are not sure about the purpose of these changes.

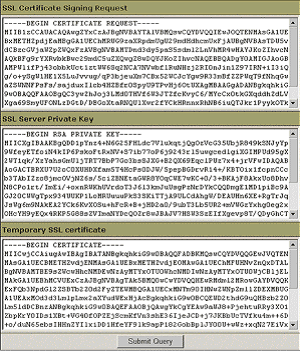
5. Follow instructions that appear at the top of the next page.

IMAGE


  • SSL Certificate Signing request. It includes the details that you submitted on the previous step. Use this request to get an SSL certificate from Digi-Sign.

  • SSL Server Private Key. This is the secret key to decrypt messages from your visitors. It must be stored in a secure place where it is inaccessible to others. Don't lose this key; you will need it if you get a permanent certificate.

  • Temporary SSL Certificate. It validates your identity and confirms the public key to assure the visitors that they are communicating with your server, not any other party.

6. Copy the signing request and private key for later use.

IBM HTTP Server

Important Note:

Effective 1 January 2011, we will no longer support any Certificate Signing Request [CSR] generated with a 1024 bit key. This is because NIST, PKIX, WebTrust and other respective security standards no longer consider the 1024 bit key size as secure. Read more > [1]

Instructions

Using IKEYMAN for CSR Generation

NOTE: If you are starting IKEYMAN to create a new key database file, the file is stored in the directory where you start IKEYMAN.

To create a new Key Database:

  • A key database is a file that the server uses to store one or more key pairs and certificates. You can use one key database for all your key pairs and certificates, or create multiple databases.
  • Enter IKEYMAN on a command line on UNIX, or start the Key Management utility in the IBM HTTP Server folder, on Windows.
  • Select Key Database File from the main user interface, select New.
  • In the New dialog box, enter your key database name. Click OK.
  • In the Password Prompt dialog box, enter a password, enter to confirm the password. Click OK.


Creating a New Key Pair and Certificate Request:

  • Enter IKEYMAN on a command line on UNIX, or start the Key Management utility in the IBM HTTP Server folder on Windows.
  • Select Key Database File, from the main user interface and select Open.
  • In the Open dialog box, select your key database name. Click OK.
  • In the Password Prompt dialog box, enter your correct password and click OK.
  • Select Create from the main user interface, select New Certificate Request.
  • In the New Key and Certificate Request dialog box, enter:

    • Key Label: A descriptive comment to identify the key and certificate in the database.
    • Keysize:
    • Organization Name:
    • Organization Unit:
    • Locality:
    • State/Province:
    • Zipcode/Postcode:#
    • Country: Enter a country code. Example: US or GB etc
    • Certificate request file name, or use the default name
  • Click OK.
  • In the Information dialog box, click OK.

Java Server

Important Note:

Effective 1 January 2011, we will no longer support any Certificate Signing Request [CSR] generated with a 1024 bit key. This is because NIST, PKIX, WebTrust and other respective security standards no longer consider the 1024 bit key size as secure. Read more > [1]

Instructions

Creating a New Key Pair

  • Use the keytool command to create the key file:
  • keytool -genkey -keyalg RSA -keystore domain.key

  • The following questions will be asked if not known:
  • Enter keystore password: (NOTE:remember this for later use)

    • What is your first and last name? - This is the Common Name (Domain Name
    • What is the name of your organizational unit?
    • What is the name of your organization?
    • What is the name of your City or Locality?
    • What is the name of your State or Province?
    • What is the two-letter country code for this unit?
  • You will then be asked if the information is correct:
  • Is CN=www.yourdomain.com, OU=Your Organizational Unit, O=Your Organization, L=Your City, ST=Your State, C=Your Country correct?

  • When you answer 'y' or 'yes' the password is then requested:
  • Enter key password for

    NOTE:Make a note of this password
    is the default alias for the certificate

  • Use the keytool command to create the CSR file:
  • Keytool -certreq -keyalg RSA -alias yyy (where yyy is the alias name you will need to remember) -file domain.csr -keystore domain.key

  • You will be prompted to enter the password.
  • Enter keystore password:

    If the password is correct then the CSR is created.
    If the password is incorrect then a password error is displayed.

  • You will need the text from this CSR when requesting a certificate

Tomcat Server

Important Note:

Effective 1 January 2011, we will no longer support any Certificate Signing Request [CSR] generated with a 1024 bit key. This is because NIST, PKIX, WebTrust and other respective security standards no longer consider the 1024 bit key size as secure. Read more > [1]

Instructions

Creating a New Key Pair

  • Use the keytool command to create the key file:
  • keytool -genkey -keyalg RSA -keystore domain.key

  • The following questions will be asked if not known:
  • Enter keystore password: (NOTE:remember this for later use)

    • What is your first and last name? - This is the Common Name (Domain Name
    • What is the name of your organizational unit?
    • What is the name of your organization?
    • What is the name of your City or Locality?
    • What is the name of your State or Province?
    • What is the two-letter country code for this unit?
  • You will then be asked if the information is correct:
  • Is CN=www.yourdomain.com, OU=Your Organizational Unit, O=Your Organization, L=Your City, ST=Your State, C=Your Country correct?

  • When you answer 'y' or 'yes' the password is then requested:
  • Enter key password for

    NOTE:Make a note of this password
    is the default alias for the certificate

  • Use the keytool command to create the CSR file:
  • Keytool -certreq -keyalg RSA -alias yyy (where yyy is the alias name you will need to remember) -file domain.csr -keystore domain.key

  • You will be prompted to enter the password.
  • Enter keystore password:

    If the password is correct then the CSR is created.
    If the password is incorrect then a password error is displayed.

  • You will need the text from this CSR when requesting a certificate

Lotus Domino Server versions 4.6x and 5.0x

Important Note:

Effective 1 January 2011, we will no longer support any Certificate Signing Request [CSR] generated with a 1024 bit key. This is because NIST, PKIX, WebTrust and other respective security standards no longer consider the 1024 bit key size as secure. Read more > [1]

Instructions

For version 4.6x:

  • From the administration panel, click System Databases and choose Open Domino Server Certificate Administration (CERTSRV.NSF) on the local machine. Click Create Key Ring.
  • Enter a name for the key ring file in the "Key Ring File Name" field.
  • Enter a password for the server key ring file in the "Key Ring Password" field.
      NOTE: The password is case sensitive.
  • Select a key size. This is the size Domino uses when creating the public and private key pairs.
      NOTE: If you are using the international version of Domino, only the 512 bit key size will work for you unless you have Release R5.04.
  • Specify the components of your server's distinguished name.
  • Click Create Key Ring. Click OK.
  • Click Create Certificate Request.

NOTE: You must select all the text in the second dialog box, including Begin Certificate and End Certificate when the CSR is requested.


For R5.0x:

  • Launch the Domino Administration client.
  • Select File-Open Server and select the Domino server you wish to administer, Click the file tab, double click on Server Certificate Administration database (certsrv.nsf)
  • From the administration panel, click System Databases and choose Open Domino Server Certificate Administration (CERTSRV.NSF) on the local machine.
  • Click Create Key Ring.
  • Enter a name for the key ring file in the "Key Ring File Name" field.
  • Enter a password for the server key ring file in the "Key Ring Password" field.
      NOTE: The password is case sensitive. If you are using the international version of Domino, only the 512 bit key size will work for you unless you have Release R5.04.
  • Specify the components of your server's distinguished name.
  • Click Create Key Ring. Click OK.
  • Click Create Certificate Request.


NOTE: You must select all the text in the second dialog box, including Begin Certificate and End Certificate when the CSR is requested.

Microsoft IIS 4.x

Important Note:

Effective 1 January 2011, we will no longer support any Certificate Signing Request [CSR] generated with a 1024 bit key. This is because NIST, PKIX, WebTrust and other respective security standards no longer consider the 1024 bit key size as secure. Read more > [1]

Instructions

A CSR is a file containing your certificate application information, including your Public Key. Generate your CSR and then copy and paste the CSR file into the web form in the enrolment process:

Generate keys and certificate:

  • Open the Microsoft Management Console (MMC) for IIS (available in the Windows NT 4.0 Option Pack > Microsoft Internet Information Server > Internet Service Manager.
  • In the MMC, Expand the Internet Information Server folder and expand the computer name
  • Open the properties window for the website the CSR is for. You can do this by right clicking on the website
  • Open Directory Security Folder
  • In the Secure Communications area of this Property Sheet, select the Key Manager button and select "Create New Key..."
  • Choose "Put the request in a file that you will send to an authority." Select an appropriate filename (or accept the default).
  • Fill in the appropriate details:
  • Fill in all the fields; do not use the following characters:
    ! @ # $ % ^ * ( ) ~ ? > < & / \
    Note: If your server is 256 bit enabled, you will generate a 2048 bit key
    If your server is 256 bit you can generate up to 2048 bit keys
  • Click Next until you finish
  • Click Finish
  • Key Manager will display a key icon under the WWW icon. The key will have an orange slash through it indicating it is not complete. Choose the "Computers" menu and select Exit. Select YES when asked to commit changes
  • When you make your application, make sure you include this file (this is your CSR) in its entirety into the appropriate section of the enrolment form - including
  • -----BEGIN CERTIFICATE REQUEST-----to-----END CERTIFICATE REQUEST-----

  • Click Next
  • Confirm your details in the enrolment form
  • Finish


We recommend that you make a note of your password and backup your key, as only you know these, so if you loose them we can't help! A floppy diskette or other removable media is recommended for your backup files

Microsoft IIS 5.x / 6.x

Important Note:

Effective 1 January 2011, we will no longer support any Certificate Signing Request [CSR] generated with a 1024 bit key. This is because NIST, PKIX, WebTrust and other respective security standards no longer consider the 1024 bit key size as secure. Read more > [1]

Instructions
  • For instructions on generating a Certificate Signing Request (CSR) using Microsoft IIS 5.x / 6.x for certificate renewal, click here.

    A CSR is a file containing your certificate application information, including your Public Key. Generate your CSR and then copy and paste the CSR file into the web form in the enrollment process:

  • Generate keys and Certificate Signing Request:

    • Select Administrative Tools
    • Start Internet Services Manager


    IMAGE


  • Open the properties window for the website the CSR is for. You can do this by right clicking on the Default Website and selecting Properties from the menu

  • Open Directory Security by right clicking on the Directory Security tab.

  • IMAGE


  • Click Server Certificate. The following Wizard will appear:

  • IMAGE


  • Click Create a new certificate and click Next.

  • IMAGE


  • Select Prepare the request and click Next.

  • IMAGE


  • Provide a name for the certificate; this needs to be easily identifiable if you are working with multiple domains. This is for your records only.
  • If your server is 256 bit enabled, you will generate a 2048 bit key. We recommend you stay with the default of 2048 bit key if the option is available. Click Next

  • IMAGE


  • Enter Organisation and Organisation Unit, these are your company name and department respectively. Click Next.

  • IMAGE


  • The Common Name field should be the Fully Qualified Domain Name (FQDN) or the web address for which you plan to use your Certificate, e.g. the area of your site you wish customers to connect to using SSL. For example, a Digi-Sign Certificate issued for
    digi-sign.com will not be valid for secure.digi-sign.com. If the web address to be used for SSL is secure.digi-sign.com, ensure that the common name submitted in the CSR is secure.digi-sign.com. Click Next.

  • IMAGE


  • Enter your country, state and city. Click Next.

  • IMAGE


  • Enter a filename and location to save your CSR. You will need this CSR to enroll for your Certificate. Click Next.

  • IMAGE


  • Check the details you have entered. If you have made a mistake click Back and amend the details. Be especially sure to check the domain name the Certificate is to be "Issued To". Your Certificate will only work on this domain. Click Next when you are happy the details are absolutely correct.
  • When you make your application, make sure you include the CSR in its entirety into the appropriate section of the enrollment form - including
  • -----BEGIN CERTIFICATE REQUEST-----to-----END CERTIFICATE REQUEST-----

    • Click Next
    • Confirm your details in the enrollment form
    • Finish

    To save your private key:

  • Go to: Certificates snap in the MMC
  • Select Requests
  • Select All tasks
  • Select Export


We recommend that you make a note of your password and backup your key as these are known only to you, so if you loose them we can't help! A floppy diskette or other removable media is recommended for your backup files.

Microsoft IIS 7 Server 2008

Important Note:

Effective 1 January 2011, we will no longer support any Certificate Signing Request [CSR] generated with a 1024 bit key. This is because NIST, PKIX, WebTrust and other respective security standards no longer consider the 1024 bit key size as secure. Read more > [1]

Instructions

Follow these instructions to generate a certificate request (CSR).

  • Open the Internet Information Services (IIS) Manager. From the Start button select Programs > Administrative Tools > Internet Information Services Manager

  • In the IIS Manager, select the server node on the top left under Connections

  • In the Features pane (the middle pane), double-click the Server Certificates option located under the IIS or Security heading (depending on your current group-by view)

  • From the Actions pane on the top right, select Create Certificate Request. The Distinguished Name Properties dialog box opens

  • You will be asked for several pieces of info which will be used by Digi-Sign to create your new
    SSL certificate. These fields include the Common Name (aka domain, FQDN), organization, country, key bit length, etc. Use the CSR Legend in the right-hand column of this page to guide you when asked for this information. The following characters should not be used when typing in your CSR input: < > ~ ! @ # $ % ^ / \ ( ) ? , &

  • THIS IS THE MOST IMPORTANT STEP! Enter your site's Common Name. The Common Name is the fully-qualified-domain name for your web site or mail server. What ever your enduser will see in their browser's address bar is what you should put in here. Do not include http:// nor https://. Refer to the CSR legend in the right-hand column of this page for examples. If this is wrong, your certificate will not work properly

  • Enter your Organization (e.g., Gotham Books Inc) and Organizational Unit (e.g., Internet Sales). Click Next

  • Enter the rest of the fields using the CSR Legend on the right right-hand column of this page for guidance and examples. Click Next to continue

  • The next screen of the wizard asks you to choose cryptography options. The default Microsoft RSA SChannel Cryptography Provider is fine and a key bit-length of at least 2048 bits. Click Next to continue

  • Finally, specify a file name for the certificate request. It doesn't matter what you call it or where you save it as long as you know where to find it. You'll need it in the next step. We recommend calling it certreq.txt

  • Click Finish to complete the certificate request (CSR) Wizard

  • Now, from a simple text editor such as Notepad (do not use Word), open the CSR file you just created at c:\certreq.txt (your path/filename may be different). You will need to copy and paste the contents of this file, including the top and bottom lines, into the relevant box during the online order process


Microsoft ISA 2000 Server

Important Note:

Effective 1 January 2011, we will no longer support any Certificate Signing Request [CSR] generated with a 1024 bit key. This is because NIST, PKIX, WebTrust and other respective security standards no longer consider the 1024 bit key size as secure. Read more > [1]

Instructions

Since Microsoft ISA 2000 Server does not have a direct interface for generating Certificate Signing Request, you may need to follow the CSR generation instructions for Microsoft IIS4/IIS5/IIS6 web servers [11]

Microsoft Office Communications Server [OCS] 2007

Important Note:

Effective 1 January 2011, we will no longer support any Certificate Signing Request [CSR] generated with a 1024 bit key. This is because NIST, PKIX, WebTrust and other respective security standards no longer consider the 1024 bit key size as secure. Read more > [1]

Instructions

Microsoft Office Communications Server [OCS] 2007

The best resource for Microsoft OCS 2007 is to go directly to the Microsoft TechNet site and follow the instructions for sub section 3.6 Configure Certificates for Front End, Web Conferencing and A/V Server Roles [12].

Once you have followed these instructions, then visit sub section 3.7 Configure the Web Components Server IIS Certificate [12].

Microsoft SMTP Server

Important Note:

Effective 1 January 2011, we will no longer support any Certificate Signing Request [CSR] generated with a 1024 bit key. This is because NIST, PKIX, WebTrust and other respective security standards no longer consider the 1024 bit key size as secure. Read more > [1]

Instructions

A CSR is a file containing your certificate application information, including your Public Key. Generate your CSR and then copy and paste the CSR file into the web form in the enrollment process or send it via email to your account manager in Digi-Sign:

Generate keys and Certificate Signing Request:

  • Select Administrative Tools
  • Start Internet Services Manager


IMAGE


  • Open the properties window for the SMTP Server the CSR is for. You can do this by right clicking on the Default SMTP Virtual Server and selecting Properties from the menu
  • Open Access by clicking the Access tab.

  • IMAGE


  • Click Certificate. The following Wizard will appear:

  • IMAGE


    IMAGE


  • Click Create a new certificate and click Next.

  • IMAGE


  • Select Prepare the request and click Next...

  • IMAGE


  • Provide a name for the certificate; this needs to be easily identifiable if you are working with multiple domains. This is for your records only.

  • If your server is 256 bit enabled, you will generate a 2048 bit key. If your server is 256 bit you can generate up to 2048 bit keys. We recommend you select the 2048 bit key if the option is available. Click Next

  • IMAGE


  • Enter Organisation and Organisation Unit; these are your company name and department respectively. Click Next.

  • IMAGE


  • The Common Name field should be the Fully Qualified Domain Name (FQDN) of your Mail Exchange server, for which you plan to use your Certificate, e.g. mail.yourdomain.com. If the web address to be used for SSL is mail.yourdomain.com, ensure that the common name submitted in the CSR is mail.yourdomain.com. Click Next.

  • IMAGE


  • Enter your country, state and city. Click Next.

  • IMAGE


  • Enter a filename and location to save your CSR. You will need this CSR to enroll for your Certificate. Click Next.

  • IMAGE


  • Check the details you have entered. If you have made a mistake click Back and amend the details. Be especially sure to check the domain name the Certificate is to be "Issued To". Your Certificate will only work on this domain. Click Next when you are happy the details are absolutely correct.

    • When you make your application, make sure you include the CSR in its entirety into the appropriate section of the enrollment form - including
    • -----BEGIN CERTIFICATE REQUEST-----to-----END CERTIFICATE REQUEST-----

      • Click Next
      • Confirm your details in the enrollment form
      • Finish

      To save your private key:

      • Go to: Certificates snap in the MMC
      • Select Requests
      • Select All tasks
      • Select Export


      We recommend that you make a note of your password and backup your key as these are known only to you, so if you loose them we can't help! A floppy diskette or other removable media is recommended for your backup files.

Ironport

Important Note:

Effective 1 January 2011, we will no longer support any Certificate Signing Request [CSR] generated with a 1024 bit key. This is because NIST, PKIX, WebTrust and other respective security standards no longer consider the 1024 bit key size as secure. Read more > [1]

Instructions

Ironport C100 is currently unable to create keys and certificate requests, however, below are some guidelines on how to generate a CSR and install an SSL certificate on your IronPort device:

*** Generate RSA Key and Certificate Request (CSR) ***

Ironport C100 is currently unable to create keys and certificate requests. You can use "openssl" toolkit on Linux/Windows to generate the CSR. Here are the commands you can use:

On a Linux/Windows computer with OpenSSL toolkit installed:

shell> openssl genrsa -des3 -out server.key 2048 openssl req -new -key
shell> servername.key -out server.csr openssl rsa -in servername.key
shell> -out server.key.PEMunsecure

*** Request Certificate from Digi-Sign **

Send the contents of the "server.csr" file to your account manager in Digi-Sign

I-Planet Web Server

Important Note:

Effective 1 January 2011, we will no longer support any Certificate Signing Request [CSR] generated with a 1024 bit key. This is because NIST, PKIX, WebTrust and other respective security standards no longer consider the 1024 bit key size as secure. Read more > [1]

Instructions

1. Sign onto the Web server and select the server to manage

IMAGE


2. Select the Security tab and then Request a Certificate

IMAGE


3. Complete the required boxes and click OK

4. An email is then sent to the email address specified containing your CSR

IMAGE


5. The CSR will be required when requesting your certificate.

I-Planet Web Server 6.x

Important Note:

Effective 1 January 2011, we will no longer support any Certificate Signing Request [CSR] generated with a 1024 bit key. This is because NIST, PKIX, WebTrust and other respective security standards no longer consider the 1024 bit key size as secure. Read more > [1]

Instructions

1. Restart the administration server by typing the following commands:

    # /usr/iplanet/servers/https-admserv/stop
    # /usr/iplanet/servers/https-admserv/start

2. To request the server certificate, click the Security tab near the top of this page.

    The Create Trust Database window is displayed.

3. Select the Request a Certificate link on the left frame.

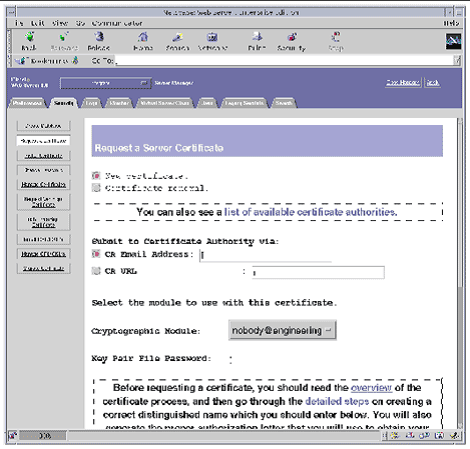
IMAGE


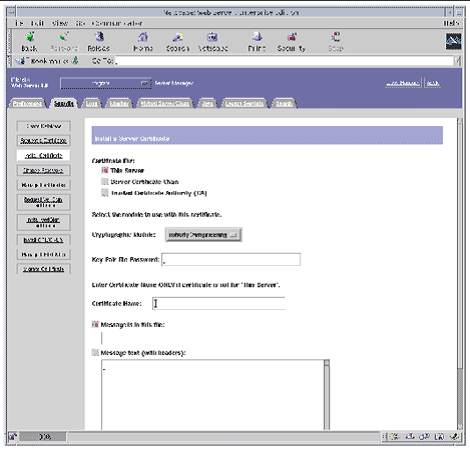
The screenshot depicts the following options:

    New certificate or Certificate renewal; View a list of available certificate authorities; Submit to Certificate Authority (CA [9]) via CA Email Address or CA URL; a drop-down menu to select the Cryptographic Module to use with this certificate ("nobody@engineering" is displayed as the default); a field for the Key Pair File Password; a link to an overview of the certificate process; fields for Requestor name, Telephone number, Common name, and Email address.

4. Fill out the form to generate a certificate request, using the following information:

    a. Select a New Certificate.

    If you can directly post your certificate request to a web-capable certificate authority or registration authority, select the CA URL link. Otherwise, choose CA Email Address and enter an email address where you would like the certificate request to be emailed to.

    b. Select the Cryptographic Module you want to use.

    Each realm has its own entry in this pull-down menu. Be sure that you select the correct realm. To use the Sun Crypto Accelerator 1000, you must select a module in the form of user@realm-name.

    c. In the Key Pair File Password dialog box, provide the password for the user@realm-name that will own the key.

    d. Provide the appropriate information for the following fields:

    • Requestor Name: Contact information for the requestor
    • Telephone Number: Contact information for the requestor
    • Common Name: Website Domain that is typed in a visitor's browser hostname.domain
    • Email Address: Contact information for requestor
    • Organization: A value for the Organization to be asserted on the certificate
    • Organizational Unit: (Optional) A value for the Organizational Unit that will be asserted on the certificate
    • Locality: (Optional) City, county, principality, or country, which is also asserted on the certificate if provided
    • State: (Optional) The full name of the state in this field
    • Country: The two-letter ISO code for the country (for example, the United States is US)

    e. Click the OK button to submit the information.

5. Send the CSR to Digi-Sign.

  • If you choose to post your certificate request to a CA URL, the certificate request is automatically posted there.
  • If you choose the CA Email Address, copy the certificate request that was mailed to you with the headers and hand it off to your certificate authority.

6. Once the certificate is generated, copy it, along with the headers, to the clipboard.

NOTE that the certificate is different from the certificate request and is usually presented to you in text form.

Sun ONE 6.x

Important Note:

Effective 1 January 2011, we will no longer support any Certificate Signing Request [CSR] generated with a 1024 bit key. This is because NIST, PKIX, WebTrust and other respective security standards no longer consider the 1024 bit key size as secure. Read more > [1]

Instructions

Request a certificate

To request a certificate, perform the following steps:

1. For the Server Manager you must first select the server instance from the drop-down list.

    Click the Request a Certificate link.
    Select if this is a new certificate or a certificate renewal.

2. Perform the following steps to specify how you want to submit the request for the certificate:

    Digi-Sign usually expects to receive the request in an email message; therefore you need to enter the email address of your account manager in Digi-Sign or Digi-Sign Production Department.

    At the end of this process, you may also copy your request in a text format and apply for your certificate online through Digi-Sign website at: http://www.digi-sign.com/product/digi-ssl/ [13] or through your Digi-CA™ [14] Service Account, if you are using the Digi-Sign certificate management system. When prompt, paste your request into a Certificate Signing Request (CSR) box.

3. Select the cryptographic module for the key-pair file you want to use when requesting the certificate from the drop-down list.

4. Enter the password for your key-pair file.

    This is the password you specified when you created the trust database, unless you selected a cryptographic module other than the internal module. The server uses the password to get your private key and encrypt a message to Digi-Sign. The server then sends both your public key and the encrypted message to Digi-Sign. Digi-Sign uses the public key to decrypt your message.

5. Enter your identification information.

    Required Information

    You need to provide the following information:
    Common Name must be the fully qualified hostname used in DNS lookups (for example, www.yourdomain.com [15]). This is the hostname in the URL that a browser uses to connect to your site. If these two names don't match, a client is notified that the certificate name doesn't match the site name, creating doubt about the authenticity of your certificate.

    Email Address is your business email address. This can be used for correspondence between you and Digi-Sign.

    Organization is the official, legal name of your company, educational institution, partnership, and so on. You need to verify this information with legal documents (such as a copy of a business license).

    Organizational Unit is an optional field that describes an organization within your company. This can also be used to note a less formal company name (without the Inc., Corp., and so on).

    Locality is a field that usually describes the city, principality, or country for the organization.

    State or Province is usually required, but can be optional.

    Country is a required, two-character abbreviation of your country name (in ISO format). The country code for the United States is U.S.

    All this information is combined as a series of attribute-value pairs called the distinguished name (DN), which uniquely identifies the subject of the certificate.

    Double-check your work to ensure accuracy. The more accurate the information, the faster your certificate is likely to be approved.

6. Click OK.

7. For the Server Manager, click Apply, and then Restart for changes to take effect.

    The server generates a certificate request that contains your information. The request has a digital signature [16] created with your private key. Digi-Sign uses a digital signature to verify that the request wasn't tampered with during routing from your server machine to Digi-Sign. In the rare event that the request is tampered with, Digi-Sign will usually contact you by phone.

    If you chose to email the request, the server composes an email message containing the request and sends the message to Digi-Sign. Typically, the certificate is then returned to you via email.

    If for any reason your network security settings or a firewall configuration prevents your server from sending the certificate request via email, copy the entire request string, that should appear on the screen and send it manually to your account manager in Digi-Sign or to Digi-Sign Production Department from a PC, that has access to Internet mail.

    Once you receive the certificate from Digi-Sign, you can install it. In the meantime, you can still use your server without SSL.

Oracle Web Server

Important Note:

Effective 1 January 2011, we will no longer support any Certificate Signing Request [CSR] generated with a 1024 bit key. This is because NIST, PKIX, WebTrust and other respective security standards no longer consider the 1024 bit key size as secure. Read more > [1]

Instructions

In this first step you generate a request for Digi-Sign to issue a certificate. It involves generating a public/private key-pair and identifying the server, the organization using it, and its Webmaster. The private key is encrypted and should never leave your server, except for backup purposes. The public key will become part of the certificate and is therefore sent to Digi-Sign, together with the rest of the information identifying your organization and your server.

To generate a certificate request, you will run the interactive utility genreq and enter the information for which it prompts you.

When the prompt specifies a default value, you can just press return to enter that value, or enter a different value if you prefer.

For an example of how to use genreq, see the following sample genreq session. Before you start, create a directory to store all SSL related files in, for example $ORACLE_HOME/ows2/ssl. To avoid typing long path names or moving files later, you can start genreq from this directory. To run genreq, do the following:

  • Start genreq, located in $ORACLE_HOME\OWS20\BIN on NT (typically c:\orant\ows20\bin) and $ORACLE_HOME/ows2/bin on UNIX:
  • Type G to begin creating a certificate request:
  • When prompted, type a password (minimum of 8 characters), used in encrypting your private key. Remember this password.
  • Retype the password for confirmation. If the password does not match, genreq will not warn you, it will just repeat step 3.
  • Choose the public exponent you want to use one in generating the key pair. The only two recognized exponents are 3 and 65537, commonly called Fermat 4 or F4.
  • Enter the size in bits of the modulus you want to use in generating the key pair. For the version of genreq sold in the United States of America, the size may be from 1 to 2048. The default size is 768 bits and the maximum is 2048 bits. A modulus size of 2048 is recommended for most browsers and also by Digi-Sign. For versions of genreq sold outside the USA, the maximum (and default) modulus size is 512 bits. (NOTE: 2048 bits would be equal to a 256 bit encryption)
  • Choose one of three methods for generating a random seed to use in generating the key pair:
    • Random file: genreq prompts you to enter the full pathname of a file in your local file system. This can be any file that is at least 256 bytes in size, does not contain any secret information, and has contents that cannot easily be guessed (on UNIX, you can use /var/adm/messages, on NT you can use \WINNT\System32\config\AppEvent.Evt)
    • Random key sequences: genreq prompts you to enter random keystrokes. Genreq uses the variation in time between keystrokes to generate the seed. Do not use the keyboard's auto repeat capability, and do not wait longer than two seconds between keystrokes. Genreq prompts you when you have typed enough keystrokes. You must delete any unused characters typed after this prompt.
    • Both: genreq prompts you to enter both a file name and random keystrokes. This option is recommended.


    The next three steps will tell genreq where it should write certain files. If you have created an SSL directory and have started genreq from this directory, you can accept the defaults. Otherwise, you may want to include full pathnames, or plan to move the files that genreq created later.

  • Enter the name of a file in which to store your WebServer's distinguished name. You can choose the default, or enter any filename with a .der extension. Genreq creates this file in the current directory, though you may later move it to any convenient location.
  • Enter the name of a file in which to store your WebServer's private key. You can choose the default, or enter any filename with a .der extension. Genreq creates this file in the current directory, though you may later move it to any convenient location.
  • Enter the name of a file in which to store the certificate request. You can choose the default, or enter any filename with a .pkc extension.
  • Enter the requested identification information for your organization:
    • Common Name - The fully qualified host name of your organization's Internet point of presence as defined by the Domain Name Service (DNS). Example: www.yoursitename.com [17]
    • Organizational Unit (optional) - The name of the group, division, or other unit of your organization responsible for your Internet presence, or an informal or shortened name for your organization. Example: Marketing Department
    • Organization - The official, legal name of your company or organization. Most CAs [9] require you to verify this name by providing official documents, such as a business license. Example: My Company Inc.
    • Locality - (optional) The city, principality, or country where your organization is located. Example: Montreal
    • State or Province - The full name of the state or province where your organization is located. Digi-Sign does not accept abbreviations. Example: Quebec
    • Country - The two-character ISO-format abbreviation for the country where your organization is located. The country code for Example: Canada is CA
    • WebMaster's Name - The name of the Web Master responsible for the site. This person will serve as a technical contact. Example: Sergio Leunissen
    • WebMaster's Email Address-The email address where Digi-Sign can contact the Web Master. Example: sleuniss@yoursitename.com [18]
    • Server Software Version - The name and version number of the application for which you are getting the certificate (you should accept the default value).


Plesk Server Administrator 2.5

Important Note:

Effective 1 January 2011, we will no longer support any Certificate Signing Request [CSR] generated with a 1024 bit key. This is because NIST, PKIX, WebTrust and other respective security standards no longer consider the 1024 bit key size as secure. Read more > [1]

Instructions

A CSR is a file containing your certificate application information, including your Public Key. Generate your CSR and then copy and paste the CSR file into the web form in the enrollment process.

Important Notes on Certificates

  • In order to use SSL certificates for a given domain, the domain MUST be set-up for
    IP-Based hosting.

  • When an IP-based hosting account is created with SSL support, a default SSL certificate is uploaded automatically. However, this certificate will not be recognized by a browser as one that is signed by a certificate signing authority.

  • The default SSL certificate can be replaced by either a self-signed certificate or one signed by a recognized certificate-signing authority. The self-signed certificate is valid and secure, but many clients prefer to have a certificate signed by a known Certificate Signing Authority.

  • You can generate a certificate with the SSLeay utility and submit it to any valid certificate authority. This can be done using the CSR option within PSA.

  • If the given domain has the www prefix enabled, you must set-up your CSR or self-signed certificate with the www prefix included. If you do not, you will receive a warning message when trying to access the domain with the www prefix.

  • Remember to enter your certificate information in PEM format. PEM format means that the RSA Private Key text must be followed by the Certificate text.

  • All certificates are located in the ../vhosts/'domain name'/cert/httpsd.pem file. Where this directory reads "domain name", you must enter the domain name for which the certificate was created.


Generate a Self-signed Certificate or Certificate Signing Request
Access the domain management function by clicking on the Domains button at the top of the PSA interface. The Domain List page appears.

    1. Click the domain name that you want to work with. The Domain Administration page appears.

    2. If you have established an IP based hosting account with SSL support, the Certificate button will be enabled.

    3. Click the Certificate button. The SSL certificate setup page appears.

    4. The Certificate Information: section lists information needed for a certificate signing request, or a self-signed certificate. You must fill out these fields before generating your CSR or self-signed certificate.

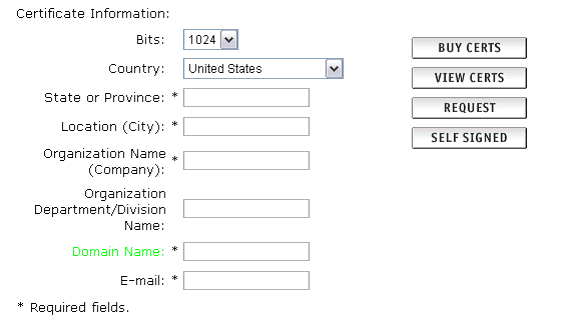
    5. The Bits selection allows you to choose the level of encryption of your SSL certificate. Select the appropriate number from the drop down box next to Bits.

    6. To enter the information into the provided text input fields (State or Province, Locality, Organization Name and Organization Unit Name (optional)) click in the text boxes and enter the appropriate name.

    7. To enter the Domain Name for the certificate click in the text box next to Domain Name: and enter the appropriate domain.

    8. The domain name is a required field. This will be the only domain name that can be used to access the Control Panel without receiving a certificate warning in the browser. The expected format is www.domainname.com [19] or domainname.com.

    9. Click on the Request button.

    10. Selecting Request results in the sending of a certificate-signing request (CSR) to the email address you provided in the certificate fields discussed above. When a CSR (certificate signing request) is generated there are two different text sections, the RSA Private Key and the Certificate Request. Do not lose your RSA private key. You will need this during the certificate installation process. Losing it is likely to result in the need to purchase another certificate.

    11. Copy and paste the Certificate Request emailed to you into the InstantSSL web form where it requests a CSR (Certificate Signing Request).

    12. When you are satisfied that the SSL certificate has been generated or the SSL certificate

Plesk 5.0

Important Note:

Effective 1 January 2011, we will no longer support any Certificate Signing Request [CSR] generated with a 1024 bit key. This is because NIST, PKIX, WebTrust and other respective security standards no longer consider the 1024 bit key size as secure. Read more > [1]

Instructions

Follow these instructions to generate a CSR for your Web site. When you have completed this process, you will have a CSR ready to submit to your provider in order to be generated into a SSL Security Certificate.

Access the domain management function by clicking on the Domains button at the top of the PSA interface. The Domain List page appears.

    1. Click the domain name that you want to secure with SSL. The Domain Administration page then appears.

    2. If you have an IP based hosting account with SSL support, the Certificate button will be enabled. If you have a name based hosting account the Certificate button will be greyed out. You must have an IP based hosting account to continue.

    3. Click the Certificate button. The SSL certificate setup page appears.

    4. The Certificate Information: section lists asks for a number of fields to be completed to generate your CSR.

    IMAGE


    5. The Bits selection allows you to choose the level of encryption of your SSL certificate. Select the appropriate number from the drop down box next to Bits.

    6. Enter your details into the State or Province, Locality, Organization Name and Organization Unit Name (optional) fields.

    7. Enter your domain name into the Domain Name: field.

    8. The domain name is a required field. This will be the only domain name that can be used to access the Control Panel without receiving a certificate warning in the browser. The expected format is www.domainname.com [19] or domainname.com

    9. Click on the Request button displayed to the right of your details.

    10. Plesk will now email your CSR to the email address provided when you signed up. You will see that the email contains two sections - the RSA Private Key and the Certificate Signing Request. Do not lose your RSA Private Key, you will need this later.

    11. Copy and paste the Certificate Request emailed to you into your SSL Provider's enrolment form where it requests a CSR (Certificate Signing Request).

    12. Click Up Level to return to the Domain Administration page.

Plesk 6.0

Important Note:

Effective 1 January 2011, we will no longer support any Certificate Signing Request [CSR] generated with a 1024 bit key. This is because NIST, PKIX, WebTrust and other respective security standards no longer consider the 1024 bit key size as secure. Read more > [1]

Instructions

Generating a certificate signing request

To generate a certificate signing request (CSR) follow these steps:

    1. At the Certificate repository page, click on the ADD button. The certificate creation page will open.

    2. Specify the certificate name.

    3. The Bits selection allows you to choose the level of encryption of your SSL certificate. Select the appropriate number from the drop-down list.

    4. Select a country from the drop-down list

    5. Specify the state or province, location (city).

    6. Enter the appropriate organization name and department/division in the field provided.

    7. Enter the Domain Name for which you wish to generate the certificate-signing request.

    8. Click the REQUEST button. A certificate-signing request will be generated and added to the repository. You will be able to add the other certificate parts later on.

NOTE: Do not lose your RSA Private Key, you will need this later.
Generating a CSR using an existing private key

In some cases you have a certificate in the repository, which has only the private key part and the other parts are missing due to some reasons. To generate a new Certificate Signing Request using the existing private key, follow these steps:

    1. At the certificate repository page, select from the list a certificate, which has the private key part only. You will be taken to the SSL certificate properties page.

    2. Click REQUEST.

Plesk 7.0

Important Note:

Effective 1 January 2011, we will no longer support any Certificate Signing Request [CSR] generated with a 1024 bit key. This is because NIST, PKIX, WebTrust and other respective security standards no longer consider the 1024 bit key size as secure. Read more > [1]

Instructions

Follow these instructions to generate a CSR for your Web site. When you have completed this process, you will have a CSR ready to submit to your provider in order to be generated into a SSL Security Certificate.

    1. Login to the Plesk 7 Control Panel select 'Domains' on the left hand menu.

    2. Click on the domain name that you wish to generate the CSR for.

    3. On the Certificate repository page click on the Add button.

    4. Specify a certificate name.

    5. Select the bit size from the drop-down list. 2048 is recommended.

    6. Select a country from the drop-down list.

    7. Specify the state or province, location (city).

    8. Enter the appropriate organization name and department in the field provided.

    9. Enter the Domain Name for which you wish to generate the certificate signing request.

    10. Click the Request button. A certificate signing request will be generated and added to the repository. When you return to the Certificates page from the list at the bottom of the page, click on the certificate name that you just created. Copy the content of this box labelled 'CSR'. It should look similar to the example below:

      -----BEGIN CERTIFICATE REQUEST-----
      MIIBSzCB9gIBADCBkDELMAkGA1UEBhMCVVMxDjAMBgNVBAgTBVRleGFzMQ4wDAYD
      ....
      HNX2uFXghrjBJw3mtZ36JhG7cLeWZK7B+4dmOL4f2ToreSW946wQMxK5ZYYOK68=
      -----END CERTIFICATE REQUEST-----

    11. Your CSR will now have been created. Copy and paste the contents into your SSL Provider's online enrolment form when requested.

Plesk 7.5

Important Note:

Effective 1 January 2011, we will no longer support any Certificate Signing Request [CSR] generated with a 1024 bit key. This is because NIST, PKIX, WebTrust and other respective security standards no longer consider the 1024 bit key size as secure. Read more > [1]

Instructions

Accessing the Domain SSL Certificates Repository

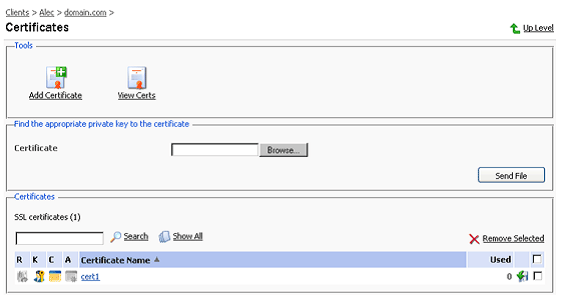
To access the Domain certificates repository page, click the Certificates icon at the Domain administration page. The certificates repository page will open displaying the list of available certificates:

IMAGE


The four icons, preceding the certificate name in the list, indicate the present parts of a certificate. The icon displayed in the R column indicates that the Certificate Signing request part is present in the certificate, the icon in the K column indicates that the private key is contained within the certificate, the icon in the C column indicates that the SSL certificate text part is present and the icon in the A column indicates that CA [9] certificate part is present. The number in the Used column indicates the number of IP addresses the certificate is assigned to.

Adding a certificate to the repository

To add a certificate to the

IMAGE

repository, click the Add Certificate icon at the Domain certificate repository page. The SSL certificate creation page will open. On this page you can generate a self-signed certificate, certificate-signing request, purchase a SSL certificate, and add the certificate parts to an existing certificate.

NOTE: When acquiring or generating new certificates, make sure that the values you enter into the fields 'domain name', 'email address', 'state or province', 'location', 'organization name', and 'department name' do not exceed the limit of 64 symbols.

Generating a Certificate Signing Request

To generate a certificate signing request (CSR) follow these steps:

    1. Specify the certificate name.

    2. The Bits selection allows you to choose the level of encryption of your SSL certificate. Select the appropriate number from the drop-down list.

    3. Select a country from the drop-down list.

    4. Specify the state or province, location (city).

    5. Enter the appropriate organization name and department/division in the field provided.

    6. Enter the Domain Name for which you wish to generate the certificate signing request.

    7. Specify the E-mail address.

    8. Click the Request button. A certificate-signing request will be generated and added to the repository. You will be able to add the other certificate parts later on.

Generating a CSR using an existing private key

A situation may occur in some cases, that you have a certificate in the repository, which has only the private key part and the other parts are missing due to some reasons. To generate a new Certificate Signing Request using the existing private key, follow these steps:

    1. At the certificate repository page, select from the list a certificate, which has the private key part only. You will be taken to the SSL certificate properties page.

    2. Click Request.


BEA Systems Weblogic

Important Note:

Effective 1 January 2011, we will no longer support any Certificate Signing Request [CSR] generated with a 1024 bit key. This is because NIST, PKIX, WebTrust and other respective security standards no longer consider the 1024 bit key size as secure. Read more > [1]

Instructions

Requesting a Private Key and Digital Certificate

You must submit your request in a particular format called a Certificate Signature Request (CSR). WebLogic Server includes a Certificate Request Generator servlet that creates a CSR. The Certificate Request Generator servlet collects information from you and generates a private key file and a certificate request file. You must then submit the CSR. Before you can use the Certificate Request Generator servlet, WebLogic Server must be installed and running.

Start the Certificate Request Generator servlet (certificate.war). The .war file is automatically installed when you start WebLogic Server. In a Web browser, enter the URL for the Certificate Request Generator servlet as follows:

https://hostname:port/Certificate [20]

Hostname is the DNS name of the machine running WebLogic Server. Port is the number of the port at which WebLogic Server listens for SSL connections.

For example, if WebLogic Server is running on a machine named 'server' and it is configured to listen for SSL communications at the default port 7002 to run the Certificate Request Generator servlet, you must enter the following URL in your Web browser:

https://server:7002/certificate [21]

The Certificate Request Generator servlet loads a form in your web browser. Complete the form displayed in your browser.

Click the Generate Request button. The Certificate Request Generator servlet displays messages informing you if any required fields are empty or if any fields contain invalid values. Click the Back button in your browser and correct any errors.

NOTE: Private Key Password if you do not specify a password, you will get an unencrypted RSA private key. If you specify a password, you will get a PKCS-8 encrypted private key. When using PKCS-8 encrypted private keys, you need to enable the Use Encrypted Keys field on the SSL tab of the Server window in the Administration Console.

When all fields have been accepted, the Certificate Request Generator servlet generates the following files in the start-up directory of your WebLogic Server: mydomain_com-key.der-The private key file. The name of this file should go into the Server Key File Name field on the SSL tab in the Administration Console. mydomain_com-request.dem-The certificate request file, in binary format. mydomain_com-request.pem-The CSR file that you submit... It contains the same data as the .dem file but is encoded in ASCII so that you can copy it into email or paste it into a Web form.

Website Pro 3.x

Important Note:

Effective 1 January 2011, we will no longer support any Certificate Signing Request [CSR] generated with a 1024 bit key. This is because NIST, PKIX, WebTrust and other respective security standards no longer consider the 1024 bit key size as secure. Read more > [1]

Instructions

A CSR is a file containing your certificate application information, including your Public Key. Generate your CSR and then copy and paste the CSR file into the web form in the enrollment process.

Generate keys and Certificate Signing Request:

  • Open Website Server Properties and select Key Ring

  • IMAGE


  • Select New Key Pair and follow the wizard:

  • IMAGE


  • Ensure all the details you enter are correct.
  • When you have completed the wizard select Done, do not select the box to choose a Certification Authority.

  • IMAGE


  • When enrolling for a Certificate locate the CSR file and copy/paste the Certificate Request text into the CSR box. Complete the online enrolment process


WS FTP Server

Important Note:

Effective 1 January 2011, we will no longer support any Certificate Signing Request [CSR] generated with a 1024 bit key. This is because NIST, PKIX, WebTrust and other respective security standards no longer consider the 1024 bit key size as secure. Read more > [1]

Instructions

1. From WS_FTP Server, in the left pane, expand the FTP host and select SSL. The SSL Host Options appear in the right pane.

2. Click Certificate Management, then select the Certificate Creation tab.

3. Enter a name in the Certificate Set Name box. This will be the name of the certificate that is generated by WS_FTP Server.

4. Click the Browse (...) button in the Output Location box to select the folder you want the certificate created in.

5. Enter information in all of the Certificate Information boxes:

  • City/Town. City or town where you are located. (Ex. Augusta)
  • State/Province. State or Province where you are located. (Ex. Georgia)
  • Organization. Company or individual user name.
  • Common Name. This can be either the name of the person creating the certificate or the fully qualified domain name of the server associated with the host.
  • Pass Phrase. Pass phrase that is to be used to encrypt the private key. It is important to remember this pass phrase. The pass phrase can be any combination of words, symbols, spaces, or numbers.
  • Pass Phrase Confirmation. Re-enter the same pass phrase as above.
  • Country. The country you are in. This must be a valid two-letter country code. (Ex. US)
  • Email. E-mail address of the person the certificate belongs to.
  • Unit. Name of organizational unit. (Ex. Research and Development)


6. After all of the boxes are filled in correctly click Create to generate the keys, certificate, and certificate-signing request. If all of the boxes are not filled in, you cannot create the certificate.

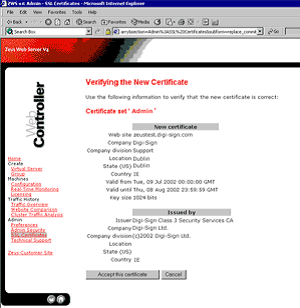
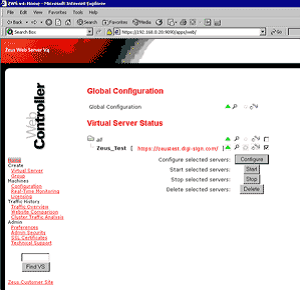
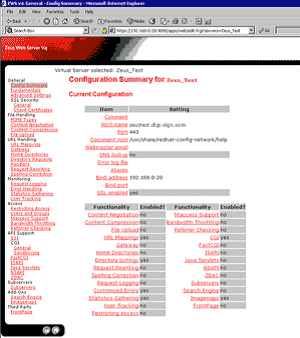
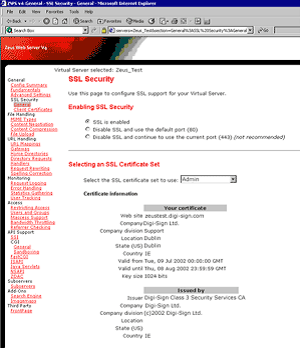
Zeus

Important Note:

Effective 1 January 2011, we will no longer support any Certificate Signing Request [CSR] generated with a 1024 bit key. This is because NIST, PKIX, WebTrust and other respective security standards no longer consider the 1024 bit key size as secure. Read more > [1]

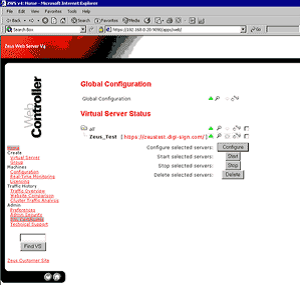
Login to the web server

  • Select SSL certificates

  • IMAGE


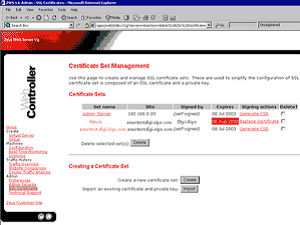
  • Against Creating a Certificate Set select Create

  • IMAGE


  • Select Buy a Certificate From Another Certifying Authority, then click OK

  • IMAGE


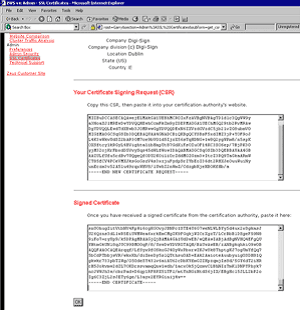
  • Complete the fields with your specific information, then click OK

  • IMAGE


  • Copy the Certificate Singing Request (CSR) text into a text editor for later use when requesting your certificate

Install Digi-SSL™

How to install your Digi-SSL™ certificate on the server
PDF [22] The final part of your Digi-SSL™ [5] application is the installation of your certificate. Installation of your Digi-SSL™ Certificate will differ greatly dependent on your webserver software. Select your webserver software from the list after reading the following general points:
General Points to remember:

When you are emailed your Digi-SSL™ certificate, two other certificates will also be attached to the email. Should they be required, you may download these certificates individually or collectively as a bundled file below:

Digi-SSL™ Xs

  • IMAGE [23] UTN-USERFirst-Hardware [23] - Root Certificate
  • IMAGE [24] Digi-Sign CA Digi-SSL™ Xs [24] - Intermediate Certificate
  • IMAGE [25] Bundled CA Chain for Apache [25]

        (needed for Apache & Plesk Administrator installations)


Digi-SSL™ Xp & Digi-SSL™ Xg

  • IMAGE [23] UTN-USERFirst-Hardware [23] - Root Certificate
  • IMAGE [26] Digi-Sign CA Digi-SSL™ Xp [26] - Intermediate Certificate
  • IMAGE [27] Bundled CA Chain for Apache [27]

        (needed for Apache & Plesk Administrator installations)


Installing Apache Mod SSL

Step-by-Step Instructions


  • Step one: Copy your certificate to file
  • You will receive an email from Digi-Sign with the certificate in the email (yourdomainname.cer or yourdomainname.crt). When viewed in a text editor, your certificate will look something like:

      -----BEGIN CERTIFICATE-----
      MIAGCSqGSIb3DQEHAqCAMIACAQExADALBgkqhkiG9w0BBwGggDCCAmowggHXAhAF
      UbM77e50M63v1Z2A/5O5MA0GCSqGSIb3DQEOBAUAMF8xCzAJBgNVBAYTAlVTMSAw
      (.......)
      E+cFEpf0WForA+eRP6XraWw8rTN8102zGrcJgg4P6XVS4l39+l5aCEGGbauLP5W6
      K99c42ku3QrlX2+KeDi+xBG2cEIsdSiXeQS/16S36ITclu4AADEAAAAAAAAA
      -----END CERTIFICATE-----


    Copy your Certificate into the directory that you will be using to hold your certificates. In this example we will use /etc/ssl/crt/. Both the public and private key files will already be in this directory. The private key used in the example will be labelled private.key and the public key will be yourdomainname.cer.

    It is recommended that you make the directory that contains the private key file only readable by root.

  • Step two: Install the Intermediate Certificates
  • You will need to install the chain certificates (intermediates) in order for browsers to trust your certificate. As well as your SSL certificate (yourdomainname.cer) two other certificates, named UTN-USERFirst-Hardware.crt and Digi-SignCADigi-SSLXp.crt or Digi-SignCADigi-SSLXs.crt, are also attached to the email from Digi-Sign.

    Apache users will not require these certificates. Instead you can install the intermediate certificates using a 'bundle' method. You can download the correct Apache bundled CA file for your SSL server certificate here [28].

    In the Virtual Host settings for your site, in the httpd.conf file, you will need to complete the following:

      1. Copy this ca-bundle file to the same directory as httpd.conf (this contains all of the CA certificates in the chain).

      2. Add the following line to SSL section of the httpd.conf (assuming /etc/httpd/conf is the directory to where you have copied the bundlecafilename.pem file). If the line already exists amend it to read the following:

    SSLCACertificateFile /etc/httpd/conf/ca-bundle/bundlecafilename.txt

    If you are using a different location and certificate file names you will need to change the path and filename to reflect your server.

    The SSL section of the updated httpd config file should now read similar to this example (depending on your naming and directories used):

    • SSLCertificateFile /etc/ssl/crt/yourdomainname.cer.
    • SSLCertificateKeyFile /etc/ssl/crt/private.key.
    • SSLCACertificateFile /etc/httpd/conf/ca-bundle/bundlecafilename.pem.
    • Save your httpd.conf file and restart Apache.

Apache OpenSSL

Step by Step Instructions


  • Step one: Copy your certificate to file
  • You will receive an email from Digi-Sign with the certificate in the email (yourdomainname.cer). When viewed in a text editor, your certificate will look something like:


      -----BEGIN CERTIFICATE-----
      MIAGCSqGSIb3DQEHAqCAMIACAQExADALBgkqhkiG9w0BBwGggDCCAmowggHXAhAF
      UbM77e50M63v1Z2A/5O5MA0GCSqGSIb3DQEOBAUAMF8xCzAJBgNVBAYTAlVTMSAw
      (.......)
      E+cFEpf0WForA+eRP6XraWw8rTN8102zGrcJgg4P6XVS4l39+l5aCEGGbauLP5W6
      K99c42ku3QrlX2+KeDi+xBG2cEIsdSiXeQS/16S36ITclu4AADEAAAAAAAAA
      -----END CERTIFICATE-----


    Copy your Certificate into the directory that you will be using to hold your certificates. In this example we will use /etc/ssl/crt/. Both the public and private key files will already be in this directory. The private key used in the example will be labelled private.key and the public key will be yourdomainname.cer.

    It is recommended that you make the directory that contains the private key file only readable by root.

  • Step two: Install the Intermediate Certificates
  • You will need to install the chain certificates (intermediates) in order for browsers to trust your certificate. As well as your SSL certificate (yourdomainname.cer) two other certificates, named UTN-USERFirst-Hardware.crt and Digi-SignCADigi-SSLXp.crt or
    Digi-SignCADigi-SSLXs.crt, are also attached to the email from Digi-Sign.

    Apache users will not require these certificates. Instead you can install the intermediate certificates using a 'bundle' method.

    In the Virtual Host settings for your site, in the httpd.conf file, you will need to complete the following:

      1. Copy this ca-bundle file to the same directory as httpd.conf (this contains all of the CA certificates in the chain).

      2. Add the following line to SSL section of the httpd.conf (assuming /etc/httpd/conf is the directory to where you have copied the ca.txt file). if the line already exists amend it to read the following:

    SSLCACertificateFile /etc/httpd/conf/ca-bundle/ca_new.txt

    If you are using a different location and certificate file names you will need to change the path and filename to reflect your server.

    The SSL section of the updated httpd config file should now read similar to this example (depending on your naming and directories used):

    • SSLCertificateFile /etc/ssl/crt/yourdomainname.cer
    • SSLCertificateKeyFile /etc/ssl/crt/private.key
    • SSLCACertificateFile /etc/httpd/conf/ca-bundle/ca.txt

    Save your httpd.conf file and restart Apache.


Java Server

  • The certificates you receive will be:
    • UTN-USERFirst-Hardware.crt
      Digi-SignCADigi-SSLXp.crt or Digi-SignCADigi-SSLXs.crt
      your_domain.crt
  • These must be imported in the correct order:
    • UTN-USERFirst-Hardware.crt
      Digi-SignCADigi-SSLXp.crt or Digi-SignCADigi-SSLXs.crt
      your_domain.crt
  • Use the keytool command to import the certificates as follows:
    • eytool -import -trustcacerts -alias root -file UTN-USERFirst-Hardware.crt -keystore domain.key

      For Digi-SSL Xp™ Certificates
      Keytool -import -trustcacerts -alias INTER -file Digi-SignCADigi-SSLXp.crt -keystore domain.key

      For Digi-SSL Xs™ Certificates
      Keytool -import -trustcacerts -alias INTER -file Digi-SignCADigi-SSLXs.crt -keystore domain.key

  • If you are using an alias then please include the alias command in the string. Example:
    • Keytool -import -trustcacerts -alias yyy (where yyy is the alias specified during CSR creation) -file your_domain.crt -keystore domain.key

      The password is then requested.

      Enter keystore password: (This is the one used during CSR creation)
      The following information will be displayed about the certificate and you will be asked if you want to trust it (the default is no so type 'y' or 'yes'):

        Owner: CN=UTN-USERFirst-Hardware, O=The USERTRUST Network, C=US
        Issuer: CN=UTN-USERFirst-Hardware, O=The USERTRUST Network, C=US
        Serial number: 44 be 0c 8b 50 00 24 b4 11 d3 36 2a fe 65 0a fd
        Valid from: Fri Jul 9 18:10:42 GMT 1999 until: Fri Jul 9 18:19:22 GMT 2019
        Certificate fingerprints:
        MD5: ...
        SHA1: 04 83 ed 33 99 ac 36 08 05 87 22 ed bc 5e 46 00 e3 be f9 d7
        Trust this certificate? [no]:
    • Then an information message will display as follows:
      • Certificate was added to keystore

        All the certificate are now loaded and the correct root certificate will be presented.

        You will need to amend your configuration to use the new keystore file you created.

    • Update server.xml configuration file:
      • 1. Open "$JAKARTA_HOME/conf/server.xml" in a text editor.

        2. Find the following section:

        <-- Define a SSL Coyote HTTP/1.1 Connector on port 8443 -->
        port="443" minProcessors="5" maxProcessors="75"
        enableLookups="true" disableUploadTimeout="true"
        acceptCount="100" debug="0" scheme="https" secure="true";
        clientAuth="false" sslProtocol="TLS" keystoreFile="domain.key"
        keystorePass="YOUR_KEYSTORE_PASSWORD" />

      After completing these configuration changes, you must restart Tomcat as you normally do, and you should be in business. You should be able to access any web application supported by Tomcat via SSL.

Tomcat Server

  • The certificates you receive will be:
    • UTN-USERFirst-Hardware.crt
      Digi-SignCADigi-SSLXp.crt or Digi-SignCADigi-SSLXs.crt
      your_domain.crt
  • These must be imported in the correct order:
    • UTN-USERFirst-Hardware.crt
      Digi-SignCADigi-SSLXp.crt or Digi-SignCADigi-SSLXs.crt
      your_domain.crt
  • Use the keytool command to import the certificates as follows:
    • eytool -import -trustcacerts -alias root -file UTN-USERFirst-Hardware.crt -keystore domain.key

      For Digi-SSL Xp™ Certificates
      Keytool -import -trustcacerts -alias INTER -file Digi-SignCADigi-SSLXp.crt -keystore domain.key

      For Digi-SSL Xs™ Certificates
      Keytool -import -trustcacerts -alias INTER -file Digi-SignCADigi-SSLXs.crt -keystore domain.key

  • If you are using an alias then please include the alias command in the string. Example:
    • Keytool -import -trustcacerts -alias yyy (where yyy is the alias specified during CSR creation) -file your_domain.crt -keystore domain.key

      The password is then requested.

      Enter keystore password: (This is the one used during CSR creation)
      The following information will be displayed about the certificate and you will be asked if you want to trust it (the default is no so type 'y' or 'yes'):

        Owner: CN=UTN-USERFirst-Hardware, O=The USERTRUST Network, C=US
        Issuer: CN=UTN-USERFirst-Hardware, O=The USERTRUST Network, C=US
        Serial number: 44 be 0c 8b 50 00 24 b4 11 d3 36 2a fe 65 0a fd
        Valid from: Fri Jul 9 18:10:42 GMT 1999 until: Fri Jul 9 18:19:22 GMT 2019
        Certificate fingerprints:
        MD5: ...
        SHA1: 04 83 ed 33 99 ac 36 08 05 87 22 ed bc 5e 46 00 e3 be f9 d7
        Trust this certificate? [no]:
    • Then an information message will display as follows:
      • Certificate was added to keystore

        All the certificate are now loaded and the correct root certificate will be presented.

        You will need to amend your configuration to use the new keystore file you created.

    • Update server.xml configuration file:
      • 1. Open "$JAKARTA_HOME/conf/server.xml" in a text editor.

        2. Find the following section:

        <-- Define a SSL Coyote HTTP/1.1 Connector on port 8443 -->
        port="443" minProcessors="5" maxProcessors="75"
        enableLookups="true" disableUploadTimeout="true"
        acceptCount="100" debug="0" scheme="https" secure="true";
        clientAuth="false" sslProtocol="TLS" keystoreFile="domain.key"
        keystorePass="YOUR_KEYSTORE_PASSWORD" />

      After completing these configuration changes, you must restart Tomcat as you normally do, and you should be in business. You should be able to access any web application supported by Tomcat via SSL.

C2Net Stronghold

NOTE: You must install both the bundle CA [9] certificate and your server certificate to provide secure access to your Web server.

Get bundle CA file

On start-up, Stronghold loads CA certificates from the file specified by the SSLCACertificateFile entry in its 'httpd.conf' file.

  • To install the bundle CA certificate, reference it in the httpd.conf file.
  • Ensure that you have saved the bundle CA certificate as a text file.
  • Open your 'httpd.conf' file and find the SSLCACertificateFile entry. By default the entry will be SSLCACertificateFile='/ssl/CA/client-rootcerts.pem'. You will find 'httpd.conf' in the directory /conf.
  • Open the file identified by SSLCACertificateFile (for example, /ssl/CA/client-rootcerts.pem) in a text editor.
  • Open the file that contains the bundle CA certificate (ca_new.txt) in a text editor.
  • Copy the bundle CA certificate (including the '-----BEGIN CERTIFICATE-----' and '-----END CERTIFICATE-----' lines to the clipboard.
  • Paste the bundle CA certificate into the file identified by SSLCACertificateFile. In most cases you will want to insert the bundle CA certificate at the end of the file and add a comment to identify the certificate.
  • Save the modified file and close the text editor.
  • Restart your web server.

To install your server certificate:

  • Save your server certificate as a text file.
  • Install the new certificate using getca, this utility is normally installed in /bin:
    Getca myhostname < /server certificate file location and name
    Where: myhostname is the common name of the Web server for which the certificate was requested (this is the same as specified when you ran genkey) and '/server certificate file location and name' is the name of the server certificate file. This will save the certificate in the file /ssl/certs/myhostname.cert
  • Restart your web server


Apache via Ensim Webappliance 3.1.x

Step by Step Instructions

Step one: Loading the Site Certificate

You will receive an email from Digi-Sign with the certificate in the email (yourdomainname.cer). When viewed in a text editor, your certificate will look something like:


    -----BEGIN CERTIFICATE-----
    MIAGCSqGSIb3DQEHAqCAMIACAQExADALBgkqhkiG9w0BBwGggDCCAmowggHXAhAF
    (.......)
    K99c42ku3QrlX2+KeDi+xBG2cEIsdSiXeQS/16S36ITclu4AADEAAAAAAAAA
    -----END CERTIFICATE-----


Copy your Certificate into the directory that you will be using to hold your certificates. In this example we will use /etc/ssl/crt/. Both the public and private key files will already be in this directory. The private key used in the example will be labelled private.key and the public key will be yourdomainname.cer.

It is recommended that you make the directory that contains the private key file only readable by root.

Login to the Administrator console and select the site that the certificate was requested for.

Select Services, then Actions next to Apache Web Server and then SSL Settings. There should already be a 'Self Signed' certificate saved.

IMAGE


Select 'Import' and copy the text from the yourdomainname.cer file into the box

IMAGE


Select 'Save', the status should now change to successful.

IMAGE


Logout, do not select delete as this will delete the installed certificate.

Step two: Install the Intermediate/Root Certificates

You will need to install the Intermediate and Root certificates in order for browsers to trust your certificate. As well as your SSL certificate ( yourdomainname.cer) two other certificates, named UTN-USERFirst-Hardware.crt and Digi-SignCADigi-SSLXp.crt or
Digi-SignCADigi-SSLXs.crt, are also attached to the email from Digi-Sign. Apache users will not require these certificates. Instead you can install the intermediate certificates using a 'bundle' method.

    Download a Bundled cert file

    In the Virtual Host settings for your site, in the virtual site file, you will need to add the following SSL directives. This may be achieved by:

      1. Copy this ca-bundle file to the same directory as the certificate (this contains all of the ca certificates in the Digi-Sign chain, except the yourdomainname.cer).

      2. Add the following line to the virtual host file under the virtual host domain for your site (assuming /etc/httpd/conf is the directory mentioned in 1.), if the line already exists amend it to read the following:

    SSLCACertificateFile /etc/httpd/conf/ca-bundle/ca_new.txt

    If you are using a different location and certificate file names you will need to change the path and filename to reflect this.
    The SSL section of the updated virtual host file should now read similar to this example (depending on your naming and directories used):

    • SSLCertificateFile /etc/ssl/crt/yourdomainname.cer
    • SSLCertificateKeyFile /etc/ssl/crt/private.key
    • SSLCACertificateFile /etc/httpd/conf/ca-bundle/ca_new.txt

    Save your virtual host file and restart Apache.
    You are now all set to start using your Digi-Sign certificate with your Apache Ensim configuration.

Certificate on a Cobalt RaQ4/XTR

Installing the site certificate

Go to the Server Management screen.
Click the green icon (Wrench for RaQ4, Pencil for XTR) next to the SSL enabled virtual site
Click SSL Settings on the left side.
Copy the entire contents of the site certificate that you received, including

-----BEGIN CERTIFICATE-----
and
-----END CERTIFICATE-----


Paste the new certificate information that you copied into the "Certificate" window.
Select Use manually entered certificate from the pull-down menu at the bottom.
Click Save Changes.

IMAGE


    Install the Intermediate Certificates

    You will need to install the Intermediate and Root certificates in order for browsers to trust your certificate. As well as your site certificate (yourdomainname.cer) two other certificates, named UTN-USERFirst-Hardware.crt and Digi-SignCADigi-SSLXp.crt or
    Digi-SignCADigi-SSLXs.crt,, are also attached to the email from Digi-Sign. Cobalt users will not require these certificates. Instead you can install the intermediate certificates using a 'bundle' method.

    Download a Bundled cert file

    The following will require that you access the httpd config file. This may be achieved by telnetting into your webserver.
    In the Global SSL settings, in the httpd.conf file, you will need to add the following SSL directive.
    This may be achieved by:
    Copying the bundle file to the same directory as httpd.conf (this contains all of the ca certificates in the Digi-Sign chain).
    Add the following line to httpd.conf, if the line already exists amend it to read the following:

    SSLCACertificateFile /etc/httpd/conf/ca-bundle/ca_new.txt

NOTE: If you are using a different location and certificate file names you will need to change the path and filename to reflect your server.

Hsphere

Installing your Certificate on Hsphere

1. After you receive your SSL certificate, firstly visit our web site download site file and the bundle file (rootchain) certificates to a secure location.

2. Click SSL on your control panel home page.

3. Go to the Web Service page and click the Edit icon in the SSL field.

4. In the form that opens, enter the SSL certificate into the box Install Certificate based on previously generated Certificate request and click Upload:

IMAGE


5. Enter the rootchain (bundle) certificate into the box Certificate Chain File and click Install:

IMAGE


6. Now you can use the SSL certificate.

IBM HTTP Server

Installing certifications on IBM HTTP Server

IKEYMAN for Certificate Installation

Digi-Sign sends more than one certificate. In addition to the certificate for your server Digi-Sign send an Intermediate CA Certificate (the Digi-Sign certificate) and a Root CA Certificate (UTN-USERFirst-Hardware). Before installing the server certificate, install both of these certificates. Follow the instructions in 'Storing a CA certificate'.

NOTE:If the authority who issues the certificate is not a trusted CA in the key database, you must first store the CA certificate and designate the CA as a trusted CA. Then you can receive your CA-signed certificate into the database. You cannot receive a CA-signed certificate from a CA who is not a trusted CA. For instructions see 'Storing a CA certificate'

Storing a CA Certificate:

  • Enter IKEYMAN on a command line on UNIX, or start the Key Management utility in the IBM HTTP Server folder on Windows.
  • Select "Key Database File" from the main User Interface, select Open.
  • In the Open dialog box, select your key database name. Click OK.
  • In the Password Prompt dialog box, enter your password and click OK.
  • Select "Signer Certificates" in the Key Database content frame, click the Add button.
  • In the Add CA Certificate from a File dialog box, select the certificate to add or use the Browse option to locate the certificate. Click OK.
  • In the Label dialog box, enter a label name and click OK.

To receive the CA-signed certificate into a key database:

  • Enter IKEYMAN on a command line on UNIX, or start the Key Management utility in the IBM HTTP Server folder on Windows.
  • Select "Key Database File" from the main User Interface, select Open.
  • In the Open dialog box, select your key database name. Click OK.
  • In the Password Prompt dialog box, enter your password, click OK.
  • Select Personal Certificates in the Key Database content frame and then click the Receive button.
  • In the Receive Certificate from a File dialog box, select the certificate file. Click OK.

Lotus Domino Server v4.6x & v5.0x

Installing certificates on Lotus Domino Server

Requires the certificates to be merged into the Key Ring file. This process must be completed for all three certificates provided.

  • In Notes, from the administration panel, click System Databases and choose Open Domino Server Certificate Administration (CERTSRV.NSF) on the local machine.
  • Click Install Certificate into Key Ring.
  • Enter the file name for the Key Ring that will store this certificate. The Key Ring file was created when you created the server Certificate Signing Request.
  • Detach the file from the email to your hard drive and unzip it.
  • Select File in the "Certificate Source" field. Enter the file name in the file name field.
  • Click "Merge Certificate into Key Ring."
  • Enter the password for the server key ring file and click OK to approve the merge.

For additional information, refer to your server documentation.

Microsoft IIS 4.x

Please note: To meet the most recent security standards [29], we strongly advise to update all servers running MS IIS 4.x with the most recent Service Packs for Windows NT 4.
We also advise to perform an upgrade on the server, of the MS Internet Explorer to at least version 5.5 Service Pack 2.

  • Step 1. Install the Server file certificate using Key Manager
  • Go to Key Manager

    Install the new Server certificate by clicking on the key in the www directory (usually a broken key icon with a line through it), and select "Install Key Certificate".

    Enter the Password

    When you are prompted for bindings, add the IP and Port Number. "Any assigned" is acceptable if you do not have any other certificates installed on the web server.
    Note: Multiple certificates installed on the same web server will require a separate IP Address for each because SSL does not support host headers.

    Go to the Computers menu and select the option "Commit Changes", or close Key Manager and select "Yes" when prompted to commit changes.

    The new Server certificate is now successfully installed.

    Back up the Key in Key Manager by clicking on Key menu> Export -> Backup File. Store the backup file on the hard drive AND off the server.

  • Step 2: Installing the Root & Intermediate Certificates:
  • Your Certificate will have been emailed to you. The email will also contain two other Certificates: UTN-USERFirst-Hardware.crt and Digi-SignCADigi-SSLXp.crt or
    Digi-SignCADigi-SSLXs.crt - save these Certificates to the desktop of the web server machine.

    It is essential that you have installed these two Certificates on the machine running IIS4. You may also download them below:

    > UTN-USERFirst-Hardware.crt
    > Digi-SignCADigi-SSLXp.crt or Digi-SignCADigi-SSLXs.crt

    Once you have installed the Certificates, restart the machine running IIS4. You must now complete one of the following procedures - the procedure you follow is dependent on the Service Pack that has been implemented on your machine running IIS4.

    ServicePack 3:
    Install the above certificates in your Internet Explorer by opening each certificate and clicking "Install Certificate". You may then use this IISCA batch file to transfer all root certificates from your Internet Explorer to the IIS (see Microsoft KnowledgeBase Q216339).

    ServicePack 4:
    Install the above certificates manually in a specific root store (you may also want to read (see Microsoft KnowledgeBase Q194788):

    • Install the UTN-USERFirst-Hardware.crt certificate by double clicking on the corresponding file this will start an installation wizard
    • select Place all certificates in the following store and click browse
    • select Show physical stores
    • select Trusted Root Certification Authorities
    • select Local Computer, click OK
    • back in the wizard, click Next, click Finish

    Repeat the same for the Digi-SignCADigi-SSLXp.crt or
    Digi-SignCADigi-SSLXs.crt , however choose to place the certificates in the Intermediate Certification Authorities store.

    ServicePack 5:
    Same as SP4.

    ServicePack 6:
    Same as SP5.

    Reboot the web server to complete the installation.

Microsoft IIS 5.x / 6.x

Installing the Root & Intermediate Certificates

You will have received 3 Certificates from Digi-Sign. Save these Certificates to the desktop of the web server machine, then:

  • Click the Start Button then select Run and type mmc
  • Click File and select Add/Remove Snap in
  • Select Add, select Certificates from the Add Standalone Snap-in box and click Add
  • Select Computer Account and click Finish
  • Close the Add Standalone Snap-in box, click OK in the Add/Remove Snap in
  • Return to the MMC
  • To install the UTN-USERFirst-Hardware.crt Certificate:

  • IMAGE


  • Right click the Trusted Root Certification Authorities, select All Tasks, and select Import.

  • IMAGE


  • Click Next.

  • IMAGE


  • Locate the UTN-USERFirst-Hardware.crt Certificate and click Next.
  • When the wizard is completed, click Finish.
  • To install the Digi-SignCADigi-SSLXp.crt or Digi-SignCADigi-SSLXs.crt:

  • IMAGE


  • Right click the Intermediate Certification Authorities, select All Tasks, and select Import.
  • Complete the import wizard again, but this time locating the Digi-SignCADigi-SSLXp.crt or Digi-SignCADigi-SSLXs.crt when prompted for the Certificate file.
  • Ensure that the UTN-USERFirst-Hardware root certificate appears under Trusted Root Certification Authorities
  • Ensure that the Digi-Sign CA Digi-SSL Xs or Digi-Sign CA Digi-SSL Xp appears under Intermediate Certification Authorities
  • Installing your SSL Certificate:

  • Select Administrative Tools
  • Start Internet Services Manager

  • IMAGE


  • Open the properties window for the website. You can do this by right clicking on the Default Website and selecting Properties from the menu.
  • Open Directory Security by right clicking on the Directory Security tab

  • IMAGE


  • Click Server Certificate. The following Wizard will appear:

  • IMAGE


  • Choose to Process the Pending Request and Install the Certificate. Click Next.
  • Enter the location of your certificate (you may also browse to locate your certificate), and then click Next.
  • Read the summary screen to be sure that you are processing the correct certificate, and then click Next.
  • You will see a confirmation screen. When you have read this information, click Next.
  • You now have a server certificate installed.

Important: You must now restart the computer or the IISAdmin Service to complete the installation

You may want to test the Web site to ensure that everything is working correctly. Be sure to use https:// when you test connectivity to the site

Microsoft IIS 7 Server 2008

Follow these instructions to install your SSL server certificate:

  • Your SSL server certificate will be sent to you by email. The email message includes the web server certificate that you purchased in the body of the email message. Copy the certificate from the body of the email and paste it into a simple text editor, such as Notepad

  • Save this as yourdomain.cer on your desktop or other location where you can find it later

  • Open the Internet Information Services (IIS) Manager. From the Start button select Programs > Administrative Tools > Internet Information Services Manager

  • In the IIS Manager, select the server node on the top left under Connections

  • In the Features pane (the middle pane), double-click the Server Certificates option located under the IIS or Security heading (depending on your current group-by view)

  • From the Actions pane on the top right, select Complete Certificate Request

  • On the Complete Certificate Request page browse to the SSL certificate file yourdomain.cer that you saved from step 2. Don't worry if your file saved as yourdomain.cer.txt, just change the Files of type drop down to browse for files of type *.*

  • Next, type a friendly name for the certificate in the Friendly name box, and then click OK. Something like www.yourdomain.com [15] will do

  • Your SSL server certificate is now installed on your server and you should see it listed in the Server Certificates view. Now you will need to configure your web site to use the certificate

  • If you have only one web site it will mostly likely be listed in IIS 7 as the Default web site. Select and right-click on the Default web site and select Edit Bindings. If you only see 'http' under the Type column of the Web Site Bindings dialog box click the Add button and select 'https' from the drop down box under Type. Then select the name of the SSL certificate from the SSL certificate list that you just installed and click Ok. Then click Close to complete the
    Edit Bindings wizard


Important: You must now restart the computer or the IISAdmin Service to complete the installation

You may want to test the Web site to ensure that everything is working correctly. Be sure to use https:// when you test connectivity to the site

Microsoft ISA 2000 Server

Instructions to install certificates on Microsoft ISA 2000 Server

You must first export the SSL certificate of the IIS 4.x / IIS 5.x / IIS 6.x Web site with the associated Private Key. If you do not have this key, ISA server will not allow you to use this certificate for SSL:

  • Open a blank Microsoft Management Console (MMC).
  • Add the Certificates snap-in.
  • When requested, select the options for 'Computer Account' and 'Local Computer'.
  • Expand Personal, and then expand Certificates. You should see a certificate with the name of your Web site in the 'Issued To' column.
  • Right-click on the certificate, select All Tasks, and then select Export.
  • On the Export window, click Next.
  • Click Yes, ensure you select 'export the private key', and then click Next.


NOTE: If you do not have the option to export the Private key then the private key has already been exported to another computer or the key never existed on this computer. You cannot use this certificate on ISA Server. You must request a new certificate for this site for ISA Server.

  • Select the option for 'Personal Information Exchange', and then click to select the appropriate check boxes for all three sub-options.
  • Assign a password and confirm it.
  • Assign a file name and location.
  • Click Finish.


NOTE: Ensure that you keep the file safe the SSL protocol depends upon this file.

Copy the file that you created to ISA Server.


On the ISA Server, open the MMC:

  • Add the Certificate snap-in, as previously instructed.
  • Click the Personal folder.
  • Right-click All Tasks, and then click Import.
  • Click Next on the Import Wizard.
  • Ensure that your file is listed, and then click Next.
  • Enter the password for the file (created earlier).
  • On the sub-option, click to select the 'Mark the private key as exportable' check box.
  • Leave the import setting on 'Automatically', and then click Next. Click Finish.

Now you will need to import the root and intermediate certificates.


On the Microsoft ISA Server:

  • Click the Start Button then select Run and type mmc
  • Click File and select Add/Remove Snap in
  • Select Add, select Certificates from the Add Standalone Snap-in box and click Add
  • Select Computer Account and click Finish
  • Close the Add Standalone Snap-in box, click OK in the Add/Remove Snap in
  • Return to the MMC.


To install the UTN-USERFirst-Hardware.crt Certificate:

  • Right click the Trusted Root Certification Authorities, select All Tasks, select Import.
  • Click Next
  • Locate the UTN-USERFirst-Hardware.crt Certificate and click Next
  • When the wizard is completed, click Finish


To install the Digi-SignCADigi-SSLXp.crt or Digi-SignCADigi-SSLXs.crt:

  • Right click the Intermediate Certification Authorities, select All Tasks, select Import
  • Complete the import wizard again, but this time locating the Digi-SignCADigi-SSLXp.crt or Digi-SignCADigi-SSLXs.crt when prompted for the Certificate file
  • Ensure that the UTN-USERFirst-Hardware.crt certificate appears under Trusted Root Certification Authorities
  • Ensure that the ComodoSecurityServicesCA appears under Intermediate Certification Authorities
  • You may need to reboot the ISA server so the registry changes could take affect


Important: You must now restart the computer to complete the install.

Under the Personal folder, when a subfolder called 'Certificates' is displayed, click "Certificates" and verify that there is a certificate with the name of the Web computer.

Right-click the certificate and then click Properties.

If the 'Intended Purposes' field of the certificate is set to 'All' rather than a list of specific purposes, the following steps must be followed before ISA Server can recognize the certificate:

In the Certificate Services snap-in, open the Properties dialog box of the relevant certificate. Change the Enable all purposes for this certificate option to the Enable only the following purposes option, select all of the items, and then click Apply.


Open the ISA Manager and complete the SSL install:

  • Right-click the server accepting the incoming connection, and click Properties.
  • Click the Incoming Web Requests tab.
  • Click the Internet Protocol (IP) address entry for the site that you are going to host, or the 'all IP addresses' entry if you do not have individual IP addresses set up.
  • Click Edit.
  • Click to select the Use a server certificate to authenticate to web users check box.
  • Click Select.
  • Select your previously imported certificate.
  • Click OK.
  • Click to select the Enable SSL listeners check box.
  • Expand the 'Publishing' folder and click on Web Publishing Rules.
  • Double click on the Web Publishing Rule that will route the SSL traffic.
  • On the Bridging tab, choose the option to Redirect SSL requests as: 'HTTP requests (terminate the secure channel at the proxy)'. Click OK.


Restart ISA Server.

Microsoft SMTP Server

1. Installing the Root & Intermediate Certificates

You will have received 3 Certificates from Digi-Sign. Save these Certificates to the desktop of the webserver machine, then:

  • Click the Start Button then select Run and type mmc
  • Click File and select Add/Remove Snap in
  • Select Add, select Certificates from the Add Standalone Snap-in box and click Add
  • Select Computer Account and click Finish
  • Close the Add Standalone Snap-in box, click OK in the Add/Remove Snap in
  • Return to the MMC
  • To install the UTN-USERFirst-Hardware.crt Certificate:

  • IMAGE


  • Right click the Trusted Root Certification Authorities, select All Tasks, select Import.

  • IMAGE


  • Click Next.

  • IMAGE


  • Locate the UTN-USERFirst-Hardware.crt Certificate and click Next.
  • When the wizard is completed, click Finish.
  • To install the Digi-SignCADigi-SSLXp.crt or Digi-SignCADigi-SSLXs.crt:

  • IMAGE


  • Right click the Intermediate Certification Authorities, select All Tasks, select Import.
  • Complete the import wizard again, but this time locating the Digi-SignCADigi-SSLXp.crt or Digi-SignCADigi-SSLXs.crt when prompted for the Certificate file.
  • Ensure that the UTN-USERFirst-Hardware root certificate appears under Trusted Root Certification Authorities
  • Ensure that the Digi-Sign CA Digi-SSL Xs or Digi-Sign CA [9] Digi-SSL Xp appears under Intermediate Certification Authorities


  • Installing your SSL Certificate:

  • Select Administrative Tools
  • Start Internet Services Manager

  • IMAGE


  • Open the properties window for the SMTP Server the Certificate is for. You can do this by right clicking on the Default SMTP Virtual Server and selecting Properties from the menu
  • Open Access by clicking the Access tab.

  • IMAGE


  • Click Certificate. The following Wizard will appear:

  • IMAGE


    IMAGE


  • Choose to Process the Pending Request and Install the Certificate. Click Next.

  • IMAGE


  • Enter the location of your certificate (you may also browse to locate your certificate), and then click Next.

  • IMAGE


  • Read the summary screen to be sure that you are processing the correct certificate, and then click Next.

  • IMAGE


  • You will see a confirmation screen. When you have read this information, click Finish.
  • You now have a server certificate installed.


2. Configuring SMTP Secure Communications:

  • To configure incoming SMTP Secure traffic click the Communication button under Access tab.

  • IMAGE


  • Check the Require secure channel option and click the OK button.

  • IMAGE


  • Open Delivery by clicking the Delivery tab and click the Outbound Security button.

  • IMAGE


  • Check the TLS encryption option and click the OK button.


Important: You must now restart the computer or the IISAdmin Service to complete the installation

Ironport

When you receive your certificates from Digi-Sign there will be your site certificate (named yourdomain.cer) plus 2 others (UTN-USERFirst-Hardware.crt and
Digi-SignCADigi-SSLXp.crt or Digi-SignCADigi-SSLXs.crt), these 2 must be installed as a Trusted Certificate Authority [9] CA and Certificate Chain.

*** Install the SSL Certificate ***

On Ironport's operating system, Async 5.5, you can't install the SSL certificate via the GUI. You must login to the command line (CLI). You can SSH into the CLI and type the following command sequence:

ironport> certconfig
[]> setup
ironport output: paste cert in PEM format (end with '.'):

Copy and paste the .crt/.cer file, including the "-----BEGIN CERTIFICATE-----" and "-----END CERTIFICATE-----" lines. If you're using windows, you may need to open this file with wordpad/notepad.

ironport output: paste key in PEM format (end with '.'):

Copy and paste the server.key.PEMunsecure file.

If you received an intermediate CA certificate, you need to perform an additional step:

ironport output: Do you want to add an intermediate certificate? [N]> Y

Copy and paste the contents of the intermediate CA certificate file here.

ironport>commit

I-Planet Web Server

When you receive your certificates from Digi-Sign there will be your site certificate (named yourdomain.cer) plus 2 others (UTN-USERFirst-Hardware.crt and
Digi-SignCADigi-SSLXp.crt or Digi-SignCADigi-SSLXs.crt), these 2 must be installed as a Trusted Certificate Authority [9] CA and Certificate Chain.

  • Sign onto the Webserver and select the server to manage.
  • Select the 'Security' tab and then 'Install Certificate'
    • Open the UTN-USERFirst-Hardware.crt in a text editor.
  • Select Trusted Certificate Authority [9] CA, enter the password and copy the text from the UTN-USERFirst-Hardware.crt to the Message Text box (including the BEGIN and END lines), then click 'OK'.
  • Accept the certificate.


  • NOTE: Do not shutdown or restart the server until all steps have been completed.

    IMAGE


  • Repeat the steps from * above using the text from the Digi-SignCADigi-SSLXp.crt or
    Digi-SignCADigi-SSLXs.crt and choosing the 'Certificate Chain' option.
  • For the site certificate again repeat the steps from * above, but this time choosing 'This Server' option.
  • At this stage all the certificates are installed and SSL now needs to be activated.

  • Select the Preferences tab and then Encryption On/Off.
  • Set encryption to 'On' and Port to 443, click OK, then Save and Apply.

  • IMAGE


  • Now shutdown and restart the server.

I-Planet Web Server 6.x

Step by step instructions

1. Select the Install Certificate link on the left side of the page.

    Once your request has been approved by Digi-Sign Authority and a Digi-SSL™ [5] certificate has been issued, you must install it in the iPlanet Web Server.

2. Select the Security Tab.

3. On the left frame, choose the Install Certificate link.

IMAGE


    The screenshot depicts the following options:
    Certificate For - This Server, Server Certificate Chain, or Trusted Certificate Authority [9] (CA); a drop-down menu to select the module to use with this certificate ("nobody@engineering" is displayed as the default); a field for the Key Pair File Password; a field to enter the Certificate Name (Note: enter certificate name ONLY if this certificate is not for 'This Server'); a field to enter the message file or a field to enter the message text with headers.
    • Open the UTN-USERFirst-Hardware in a text editor.

    Select Trusted Certificate Authority CA, enter the password and copy the text from the
    UTN-USERFirst-Hardware to the Message Text box (including the BEGIN and END lines), then click 'OK'.

    Accept the certificate.

    NOTE:: Do not shutdown or restart the server until all steps have been completed.

    Repeat the steps from above using the text from the Digi-Sign CA Digi-SSL Xs™ or
    Digi-Sign CA Digi-SSL Xp™and choosing the 'Certificate Chain' option.

4. Fill out the form to install your certificate:

  • Certificate For: This Server.
  • Cryptographic Module: Select the appropriate user@realm-name.
  • Key Pair File Password: Provide the password for the user@realm-name that owns the key that was generated earlier. .
  • Certificate Name: In most cases, you can leave this blank. If you choose to provide a name, it will alter the name the web server uses to access the certificate and key when running with SSL support.

5. Choose Message text (with headers) and paste the text you copied from your certificate file: your_domain.cer

6. Click the OK button at the bottom of the page.

    You are shown some basic information about the certificate.

7. If everything looks correct, click the Add Server Certificate button.

    On-screen messages tell you to restart the server. This is not necessary, as the web server instance has been shut down the entire time. You are also notified that in order for the web server to use SSL the web server must be configured to do so. Use the following procedure to configure the web server.

Configuring SSL on iPlanet Web Server 6.X

1. Click the Preferences tab near the top of the page.

2. Select the Edit Listen Sockets link on the left frame.

    The main frame lists all the listen sockets set for the web server instance.

    a. Alter the following fields:

    • Port: Set to the port on which you will be running your SSL-enabled web server (usually this is port 443).
    • Security: Set to On.

    b. Click the OK button to apply these changes.

    In the security field of the Edit Listen Sockets page, there should now be an Attributes link.

3. Click the Attributes link.

4. Enter the user@realm-name password to authenticate to the user@realm-name on the system.

5. Select SSL settings from the pop-up window.

    You can choose Cipher Default settings, SSL2, or SSL3/TLS. The default choice does not show the default settings. The other two choices require you to select the algorithms you want to enable.

6. Select the certificate for the user@realm-name followed by: Server-Cert (or the name you chose if it is different).

    Only keys that the appropriate user@realm-name owns appear in the Certificate Name field.

7. When you have chosen a certificate and confirmed all the security settings, click the OK button.

8. Click the Apply link in the far upper right corner to apply these changes before you start your server.

9. Click the Load Configuration Files link to apply the changes.

    You are redirected to a page that allows you to start your web server instance.

    If you click the Apply Changes button when the server is off, a pop-up window prompts you for a password. This window is not resizable, and you might have problem submitting the change.

    There are two workarounds for the problem noted above:

    • Click the Load Configuration Files instead.
    • Start up the web server first, and click on the Apply Changes button.

10. Provide the requested passwords in the dialog boxes to start the server.

    You are prompted for one or more passwords. At the Module Internal prompt, provide the password for the web server trust database.

11. At the Module user@realm-name prompt, enter the password you set when you created user in the realm-name using secadm.

12. Verify the new SSL-enabled web server at the following URL:

    https://hostname.domain: [30] server_port/

    Note that the default server_port is 443.

Sun ONE 6.x

When you receive your Digi-SSL™ [5] certificate back from Digi-Sign, it will be encrypted with your public key so that only you can decrypt it. Only by entering the correct password for your trust database, can you decrypt and install your certificate.

There are three types of certificates:

  • Your own server's certificate to present to clients
  • A Digi-Sign CA certificate for use in a certificate chain
  • A trusted CA's certificate (commonly referred to as the Root CA certificate)

A certificate chain is a hierarchical series of certificates signed by successive certificate authorities. A CA certificate identifies a certificate authority (CA) and is used to sign certificates issued by that authority. A CA certificate can in turn be signed by the CA certificate of a parent CA, and so on, up to a Root CA.

The server will use the key-pair file password you specify to decrypt the certificate when you install it. You can either save the certificates somewhere accessible to the server, or copy them in a text format and be ready to paste them into the Install Certificate form, as described here.

Installing a Certificate

To install a certificate, perform the following steps:

1. Access either the Administration Server or the Server Manager and choose the Security tab.

    For the Server Manager you must first select the server instance from the drop-down list.

2. Click the Install Certificate link.

3. Check the type of certificate you are installing:

  • This Server is for a single certificate associated only with your server
    (your Digi-SSL certificate™).
  • Server Certificate Chain is for a Digi-Sign CA certificate to include in a certificate chain.
  • Digi-Sign provides Digi-SSL™ certificates signed by either of the following CAs:

    Digi-Sign CA Digi-SSL Xs [5]
    Digi-Sign CA Digi-SSL Xp [5]

    In the email from Digi-Sign, you will find the correct CA certificate to use for the installation.

  • Trusted Certificate Authority [9] (CA) is for a certificate of a CA that you want to accept as a trusted CA.
  • Digi-Sign provides Digi-SSL™ certificates, that inherit trust from the UTN-USERFirst-Hardware Root CA globally recognized as a trusted Certification Authority. In the email from Digi-Sign, you will find the correct Root CA certificate to use for the installation.

4. Select the Cryptographic Module from the drop-down list.

5. Enter the Key-Pair File Password.

6. Leave the a name for the certificate field blank if it is to be the only one used for this server instance, unless:

  • Multiple certificates will be used for virtual servers
    Enter a certificate name unique within the server instance
  • Cryptographic modules other than internal are used
    Enter a certificate name unique across all server instances within a single cryptographic module
  • If a name is entered, it will be displayed in the Manage Certificates list, and should be descriptive. When no certificate name is entered, the default value is applied.

7. Select either:

  • Message is in this file and enters the full pathname to the saved certificate
  • Message text (with headers) and paste the certificate text
    If you copy and paste the text, be sure to include the headers "Begin Certificate"
    and "End Certificate"—including the beginning and ending hyphens.

8. Click OK.

9. Select either:

  • Add Certificate if you are installing a new certificate.
  • Replace Certificate if you are installing a certificate renewal or replacing an existing certificate.

10. Repeat steps from point 2 to 9 for each individual certificate you received from Digi-Sign and ensure you select the correct certificate type, that you are installing. We recommend, that you install certificates in the following order:

  • Trusted Certificate Authority (CA)
  • Server Certificate Chain
  • This Server (certificate)

11. For the Server Manager, click Apply, and then Restart for changes to take effect.

    The certificate is stored in the server's certificate database. The filename will be:
    -cert7.db. For example: https-serverid-hostname-cert7.db

Oracle Web Application Server

Step by step instructions

  • Delete ALL text from this file that appears before -----BEGIN CERTIFICATE. Your document should contain only certificate information within this email. After you delete extra text, save this file inside your temporary directory as TEXT and filename "mycert.der".

  • To configure OAS 4.0.8 listener with your SSL files, go to OAS 4.0.8 Node Manager page (Usually on port 8888). Click on "OAS Manager".

  • Wait for the Java Applet menu to load and expand -> Website40 Site -> HTTP listener - WWW -> Security -> SSL.

  • Type in first ROW of data
    • 1. a. Cert Label – mycert
      2. b. Cert File - Enter path and name of your certificate received. For example: C:\SSL\mycert.cer
      3. c. Dist Name File - Enter path and name for servname.der. For example: C:\SSL\servname.der
      4. d. Private Key File - Enter path and name for privkey.der. For example: C:\SSL\privkey.der
      5. e. CA [9] Dir - Enter a temporary path. This is not used, but you must supply a valid path. For example: C:\tmp.
      6. f. CRL Dir - Enter a temporary path. This is not used but you must supply a valid path. For example: C:\tmp.
      7. Click "Apply" to save changes.


  • To configure the Network section for WWW listener, go to HTTP listener -> WWW -> Network. Add a new ROW of information:
    • 1. a. Address - Use same information as DEFAULT ROW. For example: ANY.
      2. b. Port - Type port 443 here. SSL port 443 by DEFAULT.
      3. c. Security - Pick SSL from pull-down menu.
      4. d. Host Name - Use same information as DEFAULT ROW.
      5. e. Base Directory - Use same information as DEFAULT ROW.
      6. f. Log Info Directory - Use same information as DEFAULT ROW.
      7. g. Authentication - Use same information as DEFAULT ROW. (NONE)
      8. h. Certificate Label - Type "mycert". This is the same name used on Step #17 above. This entry maps Step #17 with Step# 18.
      9. Click "Apply" to save changes.


  • Now, you are ready to recycle OAS for changed to take place. Go to Website40 Site or First Icon on Your Java Applet menu. Click on "Select All" radio button. Click on the (Reload) button in toolbar. This will properly shut down and restart all OAS processes in the right order.

  • If everything starts successfully, then try to access your secure page. SSL runs on HTTPS protocol, URL format may look like:
    • https://myhost.yoursitename.com [31]
      Try to access that page in your browser. You should get a browser warning stating that you are entering a SECURE site. Just click OK. Secure page should come up.


    If you get errors while trying to start WWW listener after making these changes, then check your NT Event Log or svwww.err file. Both logs will point out what is going wrong. Some common mistakes for SSL configuration include incorrect filename spellings and directory structures, problems with certificate file because of copy/pasting, etc. Log files tend to give very specific information in that case for debugging.


Plesk Server Administrator 2.5

Step by Step Instructions

Important: Installation is a two-step process - ensure you follow both steps listed below:

  • Step 1: Upload your SSL certificate
  • Upload a New SSL Certificate

    You will be sent 3 certificates via email from Digi-Sign. The certificate named after your domain name or server is the only file from the email that you will need - this is your SSL Certificate.

      1. Firstly you need to create a SSL Certificate block text. To do this open your Certificate in a text editor such as notepad.

      2. When you applied for a Certificate your Plesk console will have emailed you a CSR [32] and a Private Key. Locate the email and copy the Private Key (not the CSR) into the text file you have just created containing your SSL Certificate. It should look something like:

        -----BEGIN RSA PRIVATE KEY-----
        [[ENCODED BLOCK OF TEXT]]
        -----END RSA PRIVATE KEY-----

        -----BEGIN CERTIFICATE-----
        [[ENCODED BLOCK OF TEXT]]
        -----END CERTIFICATE-----

      Make sure the -----BEGIN CERTIFICATE----- etc are still displayed within the text file.
      Save this file as a TXT file somewhere easily accessible from your Plesk console.

      3. In Plesk access the domain management function by clicking on the Domains button at the top of the PSA interface. The Domain List page appears.

      4. Click the domain name that you want to work with. The Domain Administration page appears.

      5. Click the Certificate button. The SSL Certificate page appears.

      6. In the Uploading Certificate File section click browse and locate the saved file just created.

      7. Then, click Send File to copy the certificate to the server. Or, if you want to type in the text of the certificate without downloading a specific file, click in the text box and enter and paste the certificate information.

      8. Click Send Text to implement the text on the server.

        When you download the certificate to the server, PSA checks for errors. If an error is detected, PSA restores the old version of the SSL certificate, and PSA warns you to update the certificate. At this point, you can try again to enter text or to download the certificate file.

      When you are satisfied that the SSL certificate is correctly implemented, click Up Level to return to the Domain Administration page.

  • Step 2: Uploading the Rootchain Certificate
  • To ensure your Certificate is trusted by all browsers you need to install a rootchain certificate for the domain:

      1.Access the domain management function by clicking on the Domains button at the top of the PSA interface. The Domain List page appears

      2.Click the domain name that you want to work with. The Domain Administration page appears.

      3.Click the Certificate button. The SSL Certificate setup page appears.

      4.The icon next to Use rootchain certificate for this domain appears on this page.

      5.If the icon is [ON] then the rootchain certificate will be enabled for this domain. If the icon is [X] this function will be disabled.

      6.Ensure the icon is [X] before continuing to step 7.

      7.To upload your rootchain certificate, first make sure that it has been saved on your local machine or network (save it to disk now by clicking here). Use the Browse button to search for and select the appropriate rootchain certificate file.

      8.Then click the Send File button. This will upload your rootchain certificate to the server to assure proper authentication of the InstantSSL certificate authority.

      9.Click the icon button again to set it to the [ON] state.

      10.When you are satisfied that the rootchain certificate is correctly implemented, click Up Level to return to the Domain Administration page.


    Advanced Notes on Certificates:

    • In order to use SSL certificates for a given domain, the domain MUST be set-up for IP-Based hosting.
    • When an IP-based hosting account is created with SSL support, a default SSL certificate is uploaded automatically. However, this certificate will not be recognized by a browser as one that is signed by a certificate signing authority.
    • If the given domain has the www prefix enabled, you must set-up your CSR or self-signed certificate with the www prefix included. If you do not, you will receive a warning message when trying to access the domain with the www prefix.
    • All certificates are located in the ../vhosts/'domain name'/cert/httpsd.pem file. Where this directory reads "domain name", you must enter the domain name for which the certificate was created.


Certificate with Plesk 5.0

Step by Step Instructions

Important: Installation is a two-step process - ensure you follow both steps listed below.

  • Step 1: Upload your SSL certificate
    • From inside PSA, choose the domain in which you are installing the SSL certificate.
    • Access the domain's SSL section by clicking on the 'certificate' button.
    • When a CSR [32] (certificate signing request) is generated there are two different text sections, the RSA Private Key (which was emailed to you by Plesk) and the Certificate Request. When installing a certificate, the RSA Private Key text needs to be pasted into the block preceding the web server site certificate. Example:
        -----BEGIN RSA PRIVATE KEY-----
        [[ENCODED BLOCK OF TEXT]]
        -----END RSA PRIVATE KEY-----
        -----BEGIN CERTIFICATE-----
        [[ENCODED BLOCK OF TEXT]]
        -----END CERTIFICATE-----
    • Paste the Private Key with the Certificate text into the Enter Certificate Text: text box and press the Send Text button.

    • IMAGE


      If successful a message is returned 'Certificate Successfully Installed'.
      If there are any errors the old certificate will replace the new certificate that you have just sent to the server and you will be required to enter it again.
      Now click Up Level to return to the Domain Administration page.

  • Step 2: Uploading the Rootchain Certificate/
  • To ensure your certificate is trusted by all browsers you need to install a rootchain certificate for the domain.

    • From inside PSA, choose the domain in which you are installing the SSL certificate.
    • Access the domain's SSL section by clicking on the 'certificate' button.
    • The icon next to Use rootchain certificate for this domain appears on this page.
    • If the icon is [ON] then the rootchain certificate will be enabled for this domain. If the icon is [X] then it is disabled.
    • Ensure the icon is [X] before continuing (you may need to click the ON/OFF button if the icon is set to [ON]):

    • IMAGE


    • Click the browse button and locate the Digi-SignCADigi-SSLXp.crt or
      Digi-SignCADigi-SSLXs.crt file you have saved from your issuance email earlier.
    • Then click the Send File button. This will upload your Intermediate certificate to the server.
    • Click the icon again to set it to the [ON] state.
    • Now click Up Level to return to the Domain Administration page.
    • Using your SSL Certificate to secure logging into your Plesk Administrator

    If you are applying your certificate to the Plesk control panel (in order to secure your login) you will need to login to Plesk Administrator and select Server.
    Select Certificate and complete the above instructions as per applying your SSL certificate to a domain.

Plesk 6.0

Uploading certificate parts

If you have already obtained a certificate containing private key and certificate part (and may be CA certificate), follow these steps to upload it:

    1. At the certificate repository page, click on the ADD button. You will be taken to the SSL certificate creation page.

    2. In the Upload certificate files section of the page, use the Browse button to locate the appropriate certificate file or a required certificate part.

    3. Click SEND FILE. This will upload your certificate parts to the repository.


You can upload an existing certificate in two ways:

    1. Choose a file from the local network and click on the SEND FILE button (.TXT files only).
    2. Type in or paste the certificate text and private key into the text fields and click on the SEND TEXT button.


Uploading a CA certificate

For the Digi-Sign CA [9] Digi-SSL Xs or Digi-Sign CA Digi-SSL Xp is the CA Certificate, or rootchain certificate. The CA Certificate is used to appropriately identify and authenticate the certificate authority, which has issued your SSL certificate. To upload your CA Certificate, follow these steps:

    1. At the certificate repository page, select a certificate from the list. You will be taken to the SSL certificate properties page.

    2. Use the Browse button, within the section related to the certificate uploading, to locate the appropriate CA Certificate file.

    3. Click SEND FILE. This will upload your CA Certificate to the repository.

NOTE: When you add a certificate, it is not installed automatically onto the domain or assigned to an IP address, but only added to the Certificate repository. You can assign a certificate to an IP address at the Client's IP pool

Plesk 7.0

Step by Step Instruction

    1. Login to the Plesk 7 Control Panel.
    2. From the left hand menu, select 'Domains'.
    3. Click on the domain name that the certificate is for.
    4. Click on the 'Certificates' menu item.
    5. There is a button in the middle of the page labelled 'Browse'. Click 'Browse' and navigate to the location of the saved site certificate you received. Selecting it, then select 'Send File', this will upload and install the certificate against the corresponding Private Key.
    6. The certificate name will now appear in the list of certificates at the bottom of the page.
    7. Click on the name of the Certificate from the list.
    8. The box on the page labelled 'CA Certificate'. You will need to paste both the intermediate certificate and UTN-USERFirst-Hardware certificate from the .zip file you have received into this box.
      They must be pasted this in order, the Digi-Sign intermediate certificate first, followed by the UTN-USERFirst-Hardware, the result will look similar to the example below (Please note: no blank line between then end of one certificate and the start of the next):


        -----BEGIN CERTIFICATE-----
        MIIEyDCCBDGgAwIBAgIEAgACmzANBgkqhkiG9w0BAQUFADBFMQswCQYDVQQGEwJV
        UzEYMBYGA1UEChMPR1RFIENvcnBvcmF0aW9uMRwwGgYDVQQDExNHVEUgQ3liZXJU
        .....
        zs1x+3QCB9xfFScIUwd21LkG6cJ3UB7KybDCRoGAAK1EqlzWINlVMr5WlvHqvaDj
        vA2AOurM+5pX7XilNj1W6tHndMo0w8+xUengDA==
        -----END CERTIFICATE-----
        -----BEGIN CERTIFICATE-----
        MIIB+jCCAWMCAgGjMA0GCSqGSIb3DQEBBAUAMEUxCzAJBgNVBAYTAlVTMRgwFgYD
        VQQKEw9HVEUgQ29ycG9yYXRpb24xHDAaBgNVBAMTE0dURSBDeWJlclRydXN0IFJv
        .....
        IjeaY8JIILTbcuPI9tl8vrGvU9oUtCG41tWW4/5ODFlitppK+ULdjG+BqXH/9Apy
        bW1EDp3zdHSo1TRJ6V6e6bR64eVaH4QwnNOfpSXY
        -----END CERTIFICATE-----


    9. Click the 'Send Text' button.
    10. Now click 'Up Level' from the top right of the screen and choose 'Setup'.
    11. At the top of the page, change the 'SSL Certificate' drop-down menu to the certificate you have just installed.
    12. Click the 'Server' item from the left hand menu.
    13. Click on the 'Service Management' menu item.
    14. You now need to Stop and Start the Apache process.

    NOTE: Restarting Apache will NOT work. You must stop the service, then start it again to complete the installation

Plesk 7.5

Accessing the Domain SSL Certificates Repository

  • To access the Domain certificates repository page, click
    IMAGE

    the Certificates icon at the Domain administration page. The certificates repository page will open displaying the list of available certificates:


  • IMAGE


    The four icons, preceding the certificate name in the list, indicate the present parts of a certificate. The icon displayed in the R column indicates that the Certificate Signing request part is present in the certificate, the icon in the K column indicates that the private key is contained within the certificate, the icon in the C column indicates that the SSL certificate text part is present and the icon in the A column indicates that CA certificate part is present. The number in the Used column indicates the number of IP addresses the certificate is assigned to.

  • Uploading a certificate file with finding the appropriate private key
    • After you have received your signed SSL certificate from the certificate authority you can upload it from the Certificate repository page. First make sure that the certificate file has been saved on your local machine or network. Use the Browse button to locate the certificate. Click Send File. The existing certificate with appropriate private key will be found and the certificate part will be added to the repository.
  • Changing a certificate name
    • To change a certificate name follow these steps:
        1. At the certificate repository page, select a certificate from the list. You will be taken to the SSL certificate properties page.
        2. Click in the Certificate name field and edit the name as desired.
        3. Click Set.
  • Uploading certificate parts
    • If you have already obtained a certificate containing private key and certificate part (and may be a CA certificate), follow these steps to upload it:
        1. At the certificate repository page, click then
        IMAGE

        Add Certificate icon. You will be taken to the SSL certificate creation page.
        2. In the Upload certificate files section of the page, use the Browse button to locate the appropriate certificate file or a required certificate part.

        NOTE: Your certificate can be contained within one or several files, so you may upload the certificate by parts or as a single file, selecting it in several fields (Plesk will recognize the appropriate certificate parts and upload them correspondingly).

        3. Click Send File. This will upload your certificate parts to the repository.


  • You can upload an existing certificate in two ways:
    • 1. Choose a file from the local network and click the Send File button (.TXT files only).

      2. Type in or paste the certificate text and private key into the text fields and click the Send Text button.

  • Uploading a CA certificate
    • For the certificates purchased through certificate signing authorities other than Verisign or Thawte you will receive what is typically called a CA Certificate, or rootchain certificate. The CA Certificate is used to appropriately identify and authenticate the certificate authority, which has issued your SSL certificate. To upload your CA Certificate, follow these steps:
        1. At the certificate repository page, select a certificate from the list. You will be taken to the SSL certificate properties page.

        2. Use the Browse button, within the section related to the certificate uploading, to locate the appropriate CA Certificate file.

        3. Click Send File. This will upload your CA Certificate to the repository.

  • You can upload an existing certificate in two ways:
    • 1. Choose a file from the local network and click the Send File button (.TXT files only).
      2. Type in or paste the CA certificate text into the text field and click the Send Text button.
  • Removing a certificate part
    • After you have uploaded a CA certificate part (rootchain certificate), you are able to remove it. To do so, follow these steps:
        1. At the certificate repository page, select a certificate from the list. You will be taken to the SSL certificate properties page.
        2.Click on the Remove button located next to the CA certificate field.


BEA Systems Weblogic

When you receive your certificates you need to store them in the mydomain directory.

NOTE: If you obtain a private key file from a source other than the Certificate Request Generator servlet, verify that the private key file is in PKCS#5/PKCS#8 PEM format.

To use a certificate chain, append the additional PEM-encoded digital certificates to the digital certificate that issued for the WebLogic Server (the intermediate CA certificate). The last digital certificate in the file chain will be the Root certificate that is self-signed. (example below:)

    -----BEGIN CERTIFICATE-----

    MIIB+jCCAWMCAgGjMA0GCSqGSIb3DQEBBAUAMEUxCzAJBgNVBAYTAlVTMRgwFgYD
    .....(your Intermediate CA certificate).....
    bW1EDp3zdHSo1TRJ6V6e6bR64eVaH4QwnNOfpSXY

    -----END CERTIFICATE-----

    -----BEGIN CERTIFICATE-----

    MIIE0DCCA7igAwIBAgIQMKeebbHpGVqxyFDTln1j1TANBgkqhkiG9w0BAQUFADBv

    .....(your Root CA certificate).....

    WjEZgqr9NaoNZCZpyfZxPsOFYzoxLYEmJs3AJHxkhIHg6YQU

    -----END CERTIFICATE-----


Configure WebLogic Server to use the SSL protocol; you need to enter the following information on the SSL tab in the Server Configuration window:

  • In the Server Certificate File Name field, enter the full directory location and name of the digital certificate for WebLogic Server.
  • In the Trusted CA File Name field, enter the full directory location and name of the digital certificate for Digi-Sign who signed the digital certificate of WebLogic Server. In the Server Key File Name field, enter the full directory location and name of the private key file for WebLogic Server.
  • Use the following command-line option to start WebLogic Server.
    • -Dweblogic.management.pkpassword=password where password is the password defined when requesting the digital certificate.
  • Storing Private Keys and Digital Certificates
  • Once you have a private key and digital certificate, copy the private key file generated by the Certificate Request Generator servlet and the digital certificate you received into the mydomain directory. Private Key files and digital certificates are generated in either PEM or Definite Encoding Rules (DER) format. The filename extension identifies the format of the digital certificate file. A PEM (.pem) format private key file begins and ends with the following lines, respectively:

      -----BEGIN ENCRYPTED PRIVATE KEY-----
      -----END ENCRYPTED PRIVATE KEY-----
      A PEM (.pem) format digital certificate begins and ends with the following lines, respectively:
      -----BEGIN CERTIFICATE-----
      -----END CERTIFICATE-----


    NOTE: Typically, the digital certificate file for a WebLogic Server is in one file, with either a .pem or .der extension, and the WebLogic Server certificate chain is in another file. Two files are used because different WebLogic Servers may share the same certificate chain.

    The first digital certificate in the certificate authority file is the first digital certificate in the WebLogic Server's certificate chain. The next certificates in the file are the next digital certificates in the certificate chain. The last certificate in the file is a self-signed digital certificate that ends the certificate chain. A DER (.der) format file contains binary data. WebLogic Server requires that the file extension match the contents of the certificate file.

    NOTE: If you are creating a file with the digital certificates of multiple certificate authorities or a file that contains a certificate chain, you must use PEM format. WebLogic Server provides a tool for converting DER format files to PEM format, and visa versa.

    Website Pro 3.x

    When your certificate is issued you will receive 4 certificates:

    Yourdomain.cer
    Digi-SignCADigi-SSLXp.crt or Digi-SignCADigi-SSLXs.crt
    UTN-USERFirst-Hardware.crt

    • Add the Digi-SignCADigi-SSLXp.crt or Digi-SignCADigi-SSLXs.crt certificate as Trusted Roots:

    • IMAGE


    • Then attach each certificate in turn to your website's Key Pair in the following order. At this point your Key Pair will be black:
    • Yourdomain.cer
      Digi-SignCADigi-SSLXp.crt or Digi-SignCADigi-SSLXs.crt
      UTN-USERFirst-Hardware.crt

      IMAGE


    • Your Key Pair will now turn green.
    • Stop and Start the server, your site can now be found using the https entry

    WebStar 4.x

    Step by step Instructions

    Step 1: Copy your SSL Certificate to file

      You will receive an email from us with your SSL certificate in the email. Copy & paste your SSL Certificate (including the -----BEGIN NETSCAPE CERTIFICATE CHAIN----- and -----END NETSCAPE CERTIFICATE CHAIN----- headers) into a raw text editor such as BBEdit or Notepad, ensuring that no extra line spaces or extra characters are inserted into the data. Choose to save the file as yourdomainname.txt.

    Step 2: Install your SSL Certificate

    • Make sure that your web server has SSL capabilities. It should say "SSL" in the Status window on the server, and have an SSL Security item in the list of Settings in WebSTAR Admin.
    • To install an SSL server, you may need to install WebSTAR from the distribution CD.
    • Make sure the Status window is open on the server machine.
    • In WebSTAR Admin, Settings window (on any machine), select SSL Security.
    • The top area lists the IP addresses you have set using the IP Secondary Addresses file.
    • The lower area sets your security options, including certificate and private key data. The checkboxes set your policy regarding incoming connections.
    • Each IP address uses a different certificate. You can have certificates for several of these addresses, but one IP address can only have a single certificate.
    • Select the item for the IP address, which corresponds to the host name of the current Certificate.
    • On the Security popup menu, select SSL 2 and SSL 3.
    • Use the Certificate Choose button to select the certificate file you have saved (yourdomainname.txt).
    • Use the Private Key File Choose button to select the private key file you used to generate your Certificate Signing Request.
    • Type your Private Key Password into the appropriate field.
    • Click the Save button.
    • Look at the server Status window. You should see a message confirming that the SSL certificate was accepted:
      • SSL context for xxx.xxx.xxx.xxx:443 created.
    • Encryption Ciphers
    • The cipher checkboxes indicate which encryption algorithms you will support. The client can connect only if they support at least one of the cipher you enable, and they negotiate to find the best fit.
    • Very high-security sites will just enable 3DES and RC4-128.
    • Some U.S. government sites require DES only, so if you are in that situation, do not enable the RC4 options.
    • If you decide that your server does not require DES as the primary method, consider whether to allow your server to negotiate DES (which is more computationally intensive), or to allow only RC4.
    • Most sites that want to allow overseas users will need to turn on DES, DES-40 and RC4-40. RC4-40 is the only supported encryption method that can be exported from the United States to other countries.
    • MAC is a little different, and should only be used if you need to allow users to connect to your SSL server in an insecure mode. There are a few countries where authentication is allowed but encryption is not, and clients in these countries sometimes use the MAC cipher. The MAC cipher will send your certificate to the client and ensure the integrity of the data you send, but it won't encrypt the data.

    When you have chosen your cipher settings, click Save again to send the information to the server.

    WS FTP Server

    Applying certificates

    • To apply a certificate that was sent to you as keyname.cer:
      • 1. Stop the WS_FTP Server service and close Server Manager.

        2. Navigate to your host's Security directory on the hard drive. If you are unsure what this is, open Server Manager and at Local System, select the Modify General System Settings button. Note the directory listed in the Security directory field. Each host on your system will have its own folder in this directory. The folder for the host should match the name of the host.

        3. Make a backup of the keyname.cer that should already exist in this directory. Save the keyname.cer file sent to you by the Certificate Authority [9] in its place.

        4. Open Server Manager, expand Local System and then select the SSL window under your host.

        5. Verify that Certificate field is your keyname.cer you received from the CA.

        6. Restart the WS_FTP Server service.


    • To apply a certificate that was sent to you as text in an email:
      • 1. Stop the WS_FTP Server service and close Server Manager.

        2. Navigate to your host's Security directory on the hard drive. If you are unsure what this is, open Server Manager and at Local System, select the Modify General System Settings button. Note the directory listed in the Security directory field. Each host on your system will have its own folder in this directory. The folder for the host should match the name of the host.

        3. Make a backup of the keyname.cer that should already exist in this directory.

        4. Open keyname.cer in a text-only editor (such as Notepad.exe) and replace the information in the file with the information from your CA.

        5. After saving the file, restart the WS_FTP Server service.


    Zeus

    When you receive your certificates there will be 3 files, open a text editor and then copy the text from each certificate into the text editor to form one file. The certificates should be pasted in the following sequence, your site Certificate named yourdomain.cer, Digi-SignCADigi-SSLXp.crt or Digi-SignCADigi-SSLXs.crt , UTN-USERFirst-Hardware.crt, and the resulting file should look like the following:

      -----BEGIN CERTIFICATE-----
      (Your Site Certificate Encoded Text)
      -----END CERTIFICATE-----

      -----BEGIN CERTIFICATE-----
      (Class3CertificateAthority Encoded Text)
      -----END CERTIFICATE-----

      -----BEGIN CERTIFICATE-----
      (TrustRootCertificateAuthority Encoded Text)
      -----END CERTIFICATE-----

    Please note: Make sure you include the -----BEGIN CERTIFICATE----- and -----END CERTIFICATE----- as displayed above.

    1. Login to the web server.

    2. Select SSL certificates

    IMAGE


    3. Select Generate CSR [32] (or Replace Certificate) against the certificate set

    IMAGE


    4. Copy/Paste the text from the text editor into the Signed Certificate box and click OK.

    IMAGE


    5. Then select Accept this Certificate

    IMAGE


    6. The certificate set now needs assigning to the web site. Click on the Home icon. Put a tick in the box next to the virtual server to configure and select configure.

    IMAGE


    7. Click on SSL Enabled.

    IMAGE


    8. Enable SSL and select the certificate set to use.

    IMAGE


    9. Apply and commit the changes then restart the web server.

    SSL FAQ

    Frequently Asked Questions on Digi-SSL™

    The following are frequently asked questions on the most popular web servers that use Digi-SSL™ Secure Soctket Layer [SSL] security.

    Frequently Asked Questions - Apache

    • Do I need to install all the certificates that I received?
    • I have accidentally deleted my Private Key
    • I am being told that my Certificate/Key is invalid
    • Do I need to use IP based hosting or Name based hosting?
    • What is the difference between Apache Mod_SSL and OpenSSL when installing my certificate?
    • Can I change the IP address?
    • I get 'The Page Cannot Be Displayed' when going to the HTTPS page
    • Normal PC browsers work OK, but I get 'Not Trusted' messages when I go to the same page with the MAC
    • Error: "Data decryption error"
    • I get the message "There are secure and non-secure items on the page, Would you like to proceed?"
    • When I access my secure site, a certificate for another site is displayed
    • Browsers are saying that something is not trusted
    • I get an intermittent server not found message when trying to access my site
    • Error: "Unable to configure RSA server private key"
    • Error: "no start line:pem_lib.c" or "no end line:pem_lib.c"
    • Error: "OpenSSL: error:0B080074:x509 certificate outines:x509_check_private_key:key values mismatch"


    Do I need to install all the certificates that I received?

    No, Apache users should use the bundle file on the support page instead of the Digi-Sign and GTE certificate:
    http://www.digi-sign.com/support/digi-ssl/install+certificate/index [33]
    If you do not install the bundle file you will receive not trusted messages when you go to the secure area of your web site.

    back to top

    I have accidentally deleted my Private Key

    First check your backups and see if you can re-install the Private Key. If you don't know how to re-install the key from your backups, then contact your systems administrator. Failing that, contact your server software vendor for technical support. The only alternative course of action available is a re-issuance of the certificate following the re-submitting of a replacement CSR.

    back to top

    I am being told that my Certificate/Key is invalid

    There may not be a corresponding Private Key or the key that is found is not the one that matches the certificates.
    You may also see this error: "OpenSSL: error:0B080074:x509 certificate
    outines:x509_check_private_key:key values mismatch"

    back to top

    Do I need to use IP based hosting or Name based hosting?

    Name based hosting is rarely used in production environments. IP based hosting should be used due to the way that the SSL protocol works.

    back to top

    What is the difference between Apache Mod_SSL and OpenSSL when installing my certificate?

    There is no difference, the process is the same and the directives used are the same. Apache fails on start up, what could cause this?
    If the key file has a Passphrase you need to remove it, as Apache cannot read this on start-up, you can do that with the following command: openssl rsa -in file1.key -out file2.key
    file2.key will contain your unencrypted key If you used Mozilla to download the file, it may have saved the file in compressed format.

    back to top

    Can I change the IP address?

    The certificate is not bound to any specific IP address. It is bound to the fully qualified domain name such as www.digi-sign.com [8].

    back to top

    I get 'The Page Cannot Be Displayed' when going to the HTTPS page

    Is the SSL port opened, this is usually port 443. (listen 443) Is the firewall set to allow the SSL port through. Has the server been rebooted Make sure 'Use SSL 3.0' is ticked in the web browser options.

    back to top

    Normal PC browsers work OK, but I get 'Not Trusted' messages when I go to the same page with the MAC

    This is usually caused by the directive SSLCertificateChainFile being used instead of the SSLCACertificateFile directive.

    back to top

    Error: "Data decryption error"

    This error message occurs because there are directives missing from the httpd.conf file. Most web servers can be configured to 'talk' to various browser versions in a different way, the fix for this particular problem is to add the following directives to the httpd.conf file so allowances can be made for Internet Explorer on the Mac:
    SSLSessionCache dbm:/var/cache/httpd/ssl_cache
    SSLSessionCacheTimeout 300.

    back to top

    I get the message "There are secure and non-secure items on the page, Would you like to proceed?"

    The error means that there are embedded objects or HTML tags on the page that are not being called absolutely secure. For example, a page that is loaded securely (HTTPS), and contains an image tag within the source code such as IMG SRC =http://www.yyy.com/image.gif. In this case the image is being called absolutely using the non-secure (HTTP) protocol.

    back to top

    When I access my secure site, a certificate for another site is displayed

    This problem occurs if you assign the same IP address to each host in your config file. SSL does not support name based virtual hosting (host headers are encrypted in SSL), so only the first certificate listed in your config file will be used.

    back to top

    Browsers are saying that something is not trusted

    The Root Certificates and/or Intermediate Certificates may not be installed correctly. This can be checked by clicking on 'View Certificates' when you get the error message and seeing if all three certificates are visible.
    It may also be that the certificate being used is not for the Fully Qualified Domain Name, check again using 'View Certificates' to see if the domain name on the certificate matches the domain name in the URL that you are going to.
    Check your 'Internet Options' and make sure that 'Use SSL 3.0' is ticked in the 'Advanced' section. Check your .conf file to ensure that SSL Protocol version 3 is allowed.

    back to top

    I get an intermittent server not found message when trying to access my site

    If the web server is set to check the Certificate Revocation List and the server is down, this can cause a time-out of the operation. This will not be the certificates, but something related to the browser timing out on the operation.

    When I connect via HTTPS to an Apache with Mod_SSL or OpenSSL server with Microsoft Internet Explorer (MSIE) I get various I/O errors. What is the reason?

    The first reason is that the SSL implementation in some MSIE versions has some subtle bugs related to the HTTP keep-alive facility and the SSL close notify alerts on socket connection close. Additionally the interaction between SSL and HTTP/1.1 features are problematic with some MSIE versions, too. You've to work-around these problems by forcing Apache with Mod_SSL or OpenSSL to not use HTTP/1.1, keep-alive connections or sending the SSL close notify messages to MSIE clients. This can be done by using the following directive in your SSL-aware virtual host section:

    SetEnvIf User-Agent ".*MSIE.*" nokeepalive ssl-unclean-shutdown downgrade-1.0 force-response-1.0

    Additionally it is known some MSIE versions also have problems with particular ciphers. Unfortunately you cannot workaround these bugs only for those MSIE particular clients, because the ciphers are already used in the SSL handshake phase. So a MSIE-specific SetEnvIf doesn't work to solve these problems.
    Instead you have to do more drastic adjustments to the global parameters. But before you decide to do this, make sure your clients really have problems. If not, do not do this, because it affects ALL of your clients.

    back to top

    Error: "no start line:pem_lib.c" or "no end line:pem_lib.c"

    Apache-SSL uses a toolkit called OpenSSL for its security routines. OpenSSL is very particular about the format of certificate requests and certificates. This error is specifically related to the format of the certificate.

    Check that there are 5 dashes before and after the BEGIN and END text, and they must form the first and last lines of the certificate.
    In particular, the BEGIN and END lines must look like:

    -----BEGIN CERTIFICATE-----
    Encoded Certificate
    -----END CERTIFICATE-----

    Be careful when you cut and pasted the certificate from the browser window into a text editor to create the certificate text file.
    Make sure you remove any trailing spaces, before and after the BEGIN or END lines, or you will see this error.

    back to top

    Error: "Unable to configure RSA server private key"

    Specify the correct private key for the certificate.

    Compare the modulus of certificate against the modulus of the private key to see if they match by using the following commands:

    To view the certificate modulus:

    Openssl x509 -noout -text -in certfile –modulus

    To view the key:

    Openssl rsa -noout -text -in keyfile –modulus

    Check that the certificate and private key is saved in notepad and that it has no trailing spaces.

    The "modulus" and "public exponent" portions in the key and the certificate must match exactly

    back to top

    Error: "OpenSSL: error:0B080074:x509 certificate outines: x509_check_private_key: key values mismatch"

    This error message occurs if you are using the incorrect certificate or private key during installation. So you need to use the matching key and certificate files. To check that the public key in your cert matches the public portion of your private key, view both files, and compare the modulus values with the following instructions:

    To view the certificate:
    Openssl x509 -noout -text -in certfile

    To view the key:
    Openssl rsa -noout -text -in keyfile

    The "modulus" and "public exponent" portions in the key and the certificate must match exactly. If the "modulus" do not match exactly then you are using either the incorrect private key or certificate.

    back to top

    Frequently Asked Questions - IIS 5.x & 6.0

    • I need to install all the certificates that I received?
    • I have accidentally deleted my "pending request" or "private key"
    • I am being told that my Certificate/Key is invalid
    • Do I need to use IP based hosting or Name based hosting?
    • I get 'The Page Cannot Be Displayed' when going to the HTTPS page
    • I get the message "There are secure and non-secure items on the page? Would you like to proceed?"
    • Can I change the IP address?
    • When I access my secure site, a certificate for another site is displayed
    • Browsers are saying that something is not trusted
    • Error:'This page must be viewed over a secure channel'
    • I get an intermittent server not found message when trying to access my site.
    • How do I back up my private key in IIS 5?
    • How do I move the certificate and key from IIS5 to Apache?
    • How do I force SSL for specific pages?
    • How do I export the key in IIS 5?
    • How do I import the server certificate in IIS 5?
    • How do I create a renewal CSR in IIS 5?
    • Error: "The string contains an invalid X470 name, attribute key, OID, value or delimiter"
    • Error: "The pending certificate request for this response file was not found. This request may be cancelled. You cannot install selected response certificate using this Wizard"
    • My browser stopped responding to my SSL server, other browsers can connect from a different location?
    • How do I backup the certificate and key in IIS5?


    Do I need to install all the certificates that I received?

    Yes, if you do not install all the received certificates you will receive not trusted messages when you go to the secure area of your web site.

    back to top

    I have accidentally deleted my "pending request" or "private key"

    First check your backups and see if you can re-install the "pending request" or "private key". If you don't know how to re-install the key from your backups, then contact your systems administrator. Failing that, contact your server software vendor for technical support. The only alternative course of action available is a re-issuance of the certificate following the re-submitting of a replacement CSR.

    back to top

    I am being told that my Certificate/Key is invalid

    There may not be a corresponding 'private key' or 'pending request' or the key that is found is not the one that matches the certificates.

    back to top

    Do I need to use IP based hosting or Name based hosting?

    Name based hosting is rarely used in production environments. IP based hosting should be used due to the way that the SSL protocol works.

    back to top

    I get 'The Page Cannot Be Displayed' when going to the HTTPS page

    Is the SSL port opened, this is usually port 443.
    Is the firewall set to allow the SSL port through?
    Has the server been rebooted?
    Make sure 'Use SSL 3.0' is ticked in the web browser options.

    back to top

    I get the message "There are secure and non-secure items on the page? Would you like to proceed?"

    The error means that there are embedded objects or HTML tags on the page that are not being called absolutely secure. For example, a page that is loaded securely (HTTPS), and contains an image tag within the source code such as IMG SRC =http://www.yyy.com/image.gif. In this case the image is being called absolutely using the non-secure (HTTP) protocol.

    back to top

    Can I change the IP address?

    The certificate is not bound to any specific IP address. It is bound to the fully qualified domain name such as www.digi-sign.com [8].

    back to top

    When I access my secure site, a certificate for another site is displayed

    This problem occurs if you assign the same IP address to each host in your config file. SSL does not support name based virtual hosting (host headers are encrypted in SSL), so only the first certificate listed in your config file will be sent.

    back to top

    Browsers are saying that something is not trusted

    The Root Certificates and/or Intermediate Certificates may not be installed correctly. This can be checked by clicking on 'View Certificates' when you get the error message and seeing if all three certificates are visible.
    It may also be that the certificate being used is not for the Fully Qualified Domain Name, check again using 'View Certificates' to see if the domain name on the certificate matches the domain name in the URL that you are going to.
    Check your 'Internet Options' and make sure that 'Use SSL 3.0' is ticked in the 'Advanced' section.

    back to top

    Error: 'This page must be viewed over a secure channel'

    Microsoft IIS is configured to require a secure channel.
    The following steps will allow non-secure (http) connections to your site:
    Within Microsoft Internet Information Server, right click on your web site.
    Under Secure Communications, click on Edit.
    Un-check the box that says 'Require Secure Channel'

    back to top

    I get an intermittent server not found message when trying to access my site

    If the web server is set to check the Certificate Revocation List and the server is down, this can cause a time-out of the operation.
    This will not be the certificate, but something related to the browser timing out on the operation.

    back to top

    How do I back up my private key in IIS 5?

    Start, run, type mmc

    Go into the Console Tab, Add/Remove Snap in

    Click on Add, Double Click on Certificates and Click on Add > OK

    Choose Computer Account

    Choose Local Computer

    Open up the Certificates Consol Tree

    Look for a folder labelled REQUEST, then select Certificates

    Highlight the key that you wish to back up

    Right click on the file and choose, All Tasks, Export

    Follow the Certificate Export Wizard

    Choose to mark the Private key as exportable

    Leave default settings

    Choose to save file on a set location.

    Click Finish

    You will get message that the export was successful

    Note: Once the Pending Request is completed the Key is no longer available

    back to top

    How do I move the certificate and key from IIS5 to Apache?

    Start the certificates mmc for the web server and select 'All Tasks', 'Export' against the site certificate. Do not choose to export the CA certificates. Specify a password. Specify a filename (e.g. mypkcs12.pfx). Copy the resulting .pfx file to your Apache web server.

    Then import the private key and cert file into Apache using the following commands:

    openssl pkcs12 -in mypkcs12.pfx -out pfxoutput.txt

    You'll need to enter the password at least once.

    Load pfxoutput.txt into a text editor and save each certificate as a separate file.
    Also save the private key as a separate file (e.g. myencrypted.key).

    The private key will probably be encrypted at the moment. i.e. looking something like.....

    -----BEGIN RSA PRIVATE KEY-----
    Proc-Type: 4,ENCRYPTED
    DEK-Info: DES-EDE3-CBC,.........
    .........
    -----END RSA PRIVATE KEY-----

    If the version of Apache we're using doesn't allow encrypted private keys, to decrypt the private key run the following command:

    Openssl rsa -in myencrypted.key -out my.key

    back to top

    How do I force SSL for specific pages?

    To use ASP to force SSL for specific pages follow the directions at the following url:
    http://support.microsoft.com/default.aspx?scid=kb;EN-US;q239875 [34]

    back to top

    How do I export the key in IIS 5?

    Please refer to the following URL on Microsoft's Knowledgebase: http://support.microsoft.com/support/kb/articles/Q232/1/36.ASP [35]

    back to top

    How do I import the server certificate in IIS 5?

    Please refer to the following URL on Microsoft's Knowledgebase: http://support.microsoft.com/support/kb/articles/Q232/1/37.ASP [36]

    back to top

    How do I create a renewal CSR in IIS 5?

    Create a new web site in IIS, then go to the 'Properties', 'Directory Security', 'Server Certificate' tab.

    Use the certificate wizard to create your new Key/CSR file

    Backup the private key file by following the instructions:

    Start, run, type mmc, select OK

    Go into the Console Tab, Add/Remove Snap in

    Click on "Add". Double Click on "Certificates" and Click on "Add", click "OK"

    Choose Computer Account, then Local Computer

    Open up the Certificates Consol Tree

    Look for a folder called REQUEST, Certificates

    Highlight the key that you wish to back up

    Right click on the file and choose, All Tasks, Export

    Follow the Certificate Export Wizard

    Choose to mark the Private key as exportable

    Leave default settings

    Choose to save file on a set location.

    It is important to take a copy of the private key and store it off the server; in the event

    that the server crashes.

    Click Finish

    You will get message that the export was successful

    Save the resultant CSR file to your hard drive indicating it is a renewal CSR

    Use this CSR during the purchase process.

    Once you receive the renewed certificate, install it using the wizard you used to create it
    on the same NEW website you created.

    Once installed, go to the correct website you want the certificate to run on.

    Go to 'Properties', 'Directory Security', 'Server Certificate', remove the certificate currently installed, and assign the certificate you installed in the previous step

    Restart the WWW service

    back to top

    Error: "The string contains an invalid X470 name, attribute key, OID, value or delimiter"

    To avoid this error, create a new certificate and verify that there are no special characters in any of the fields in the distinguished name.

    In particular, do not include a comma in the company name.

    The following characters are not allowed in any of the CSR fields:
    [! @ # $ % ^ * ( ) ~ ? > < & / \ , . " ']

    back to top

    Error: "The pending certificate request for this response file was not found. This request may be cancelled. You cannot install selected response certificate using this Wizard"

    You are attempting to install a certificate that does not match the private key (Pending request) that is currently residing in the Certificate Wizard. Microsoft IIS 5 only allows you to make one request per site. If you create a new CSR for the same website, your original request (and private key) will be overwritten.
    If you have a backup of the private key, you can install the certificate via the MMC if you can restore the request to the REQUEST folder.
    Unless you can find the matching private key for the certificate, you will need to have the certificates reissued.

    back to top

    My browser stopped responding to my SSL server, other browsers can connect from a different location?

    Microsoft has released a fix for this error. Please refer to the relevant knowledge base article Q285821, which can be found at the following url:
    http://support.microsoft.com/default.aspx?scid=kb;EN-US;q285821 [37]

    back to top

    How do I backup the certificate and key in IIS5?

    Start the certificates mmc for the web server and select 'All Tasks', 'Export' against the site certificate. Choose to export the CA certificates. Specify a password. Specify a filename (e.g. mypkcs12.pfx). Save the .pfx file in a safe place off the server.

    back to top

    Frequently Asked Questions - Cobalt Raq

    • I have accidentally deleted my Private Key
    • I am being told that my Certificate/Key is invalid
    • Do I need to use IP based hosting or Name based hosting?
    • Cobalt (Apache) fails on start up, what could cause this?
    • Error: "Data decryption error"
    • I get the message "There are secure and non-secure items on the page? Would you like to proceed?"
    • Can I change the IP address?
    • When I access my secure site, a certificate for another site is displayed
    • Browsers are saying that something is not trusted
    • I get an intermittent server not found message when trying to access my site
    • When I connect via HTTPS to an Apache with Mod_SSL or OpenSSL server with Microsoft Internet Explorer (MSIE) I get various I/O errors. What is the reason?


    I have accidentally deleted my Private Key

    First check your backups and see if you can re-install the Private Key. If you don't know how to re-install the key from your backups, then contact your systems administrator. Failing that, contact your server software vendor for technical support. The only alternative course of action available is a re-issuance of the certificate following the re-submitting of a replacement CSR.

    back to top

    I am being told that my Certificate/Key is invalid

    There may not be a corresponding Private Key or the key that is found is not the one that matches the certificates.
    You may also see this error: "OpenSSL: error:0B080074:x509 certificate outines:x509_check_private_key:key values mismatch"

    back to top

    Do I need to use IP based hosting or Name based hosting?

    Name based hosting is rarely used in production environments.
    IP based hosting should be used due to the way that the SSL protocol works.

    back to top

    Cobalt (Apache) fails on start up, what could cause this?

    If the key file has a pass phrase you need to remove it, as Apache cannot read this on start-up, you can do that with the following command:
    Openssl rsa -in file1.key -out file2.key
    File2.key will contain your unencrypted key
    If you used Mozilla to download the file, it may have saved the file in compressed format
    I get 'The Page Cannot Be Displayed' when going to the HTTPS page
    Is the SSL port opened, this is usually port 443. (Listen 443)?
    Is the firewall set to allow the SSL port through?
    Has the server been rebooted?
    Make sure 'Use SSL 3.0' is ticked in the web browser options.

    back to top

    Error: "Data decryption error"

    This error message occurs because there are directives missing from the httpd.conf file. Most web servers can be configured to 'talk' to various browser versions in a different way, the fix for this particular problem is to add the following directives to the httpd.conf file so allowances can be made for Internet Explorer on the Mac:
    SSLSessionCache dbm:/var/cache/httpd/ssl_cache
    SSLSessionCacheTimeout 300.

    back to top

    I get the message "There are secure and non-secure items on the page? Would you like to proceed?"

    The error means that there are embedded objects or HTML tags on the page that are not being called absolutely secure. For example, a page that is loaded securely (HTTPS), and contains an image tag within the source code such as IMG SRC =http://www.yyy.com/image.gif. In this case the image is being called absolutely using the non-secure (HTTP) protocol.

    back to top

    Can I change the IP address?

    The certificate is not bound to any specific IP address. It is bound to the fully qualified domain name such as www.digi-sign.com [8].

    back to top

    When I access my secure site, a certificate for another site is displayed

    This problem occurs if you assign the same IP address to each host in your config file. SSL does not support name based virtual hosting (host headers are encrypted in SSL), so only the first certificate listed in your config file will be sent.

    back to top

    Browsers are saying that something is not trusted

    The Root Certificates and/or Intermediate Certificates may not be installed correctly. This can be checked by clicking on 'View Certificates' when you get the error message and seeing if all three certificates are visible.
    It may also be that the certificate being used is not for the Fully Qualified Domain Name, check again using 'View Certificates' to see if the domain name on the certificate matches the domain name in the URL that you are going to.
    Check your 'Internet Options' and make sure that 'Use SSL 3.0' is ticked in the 'Advanced' section.
    Also ensure that SSL Protocol version 3 is supported.
    The bundle file must also be specified in the Global SSL section of the. conf file.

    back to top

    I get an intermittent server not found message when trying to access my site

    If the web server is set to check the Certificate Revocation List and the server is down, this can cause a time-out of the operation.
    This will not be the certificate, but something related to the browser timing out on the operation.

    back to top

    When I connect via HTTPS to an Apache with Mod_SSL or OpenSSL server with Microsoft Internet Explorer (MSIE) I get various I/O errors. What is the reason?

    The first reason is that the SSL implementation in some MSIE versions has some subtle bugs related to the HTTP keep-alive facility and the SSL close notify alerts on socket connection close. Additionally the interaction between SSL and HTTP/1.1 features are problematic with some MSIE versions, too. You've to work-around these problems by forcing Apache with Mod_SSL or OpenSSL to not use HTTP/1.1, keep-alive connections or sending the SSL close notify messages to MSIE clients. This can be done by using the following directive in your SSL virtual host section:

    Open the file with any text editor and carefully insert the code piece below in the appropriate place, around the directive for "SSLengine on", you may have to insert it in both the IF and the ELSIF portions of the setup:

    $PerlConfig .= "Listen $ip:443\n";
    $PerlConfig .= "\n";

    # ------------- INSERT THIS CODE -------------
    $PerlConfig .= "SetEnvIf User-Agent \".*MSIE.*\" \\n";
    $PerlConfig .= " nokeepalive ssl-unclean-shutdown \\n";
    $PerlConfig .= " downgrade-1.0 force-response-1.0 \n";
    # ------------- END INSERT -------------------

    $PerlConfig .= "SSLengine on\n";
    $PerlConfig .= "SSLCertificateFile /home/sites/$group/certs/certificate\n";
    $PerlConfig .= "SSLCertificateKeyFile /home/sites/$group/certs/key\n";
    $PerlConfig .= join('', @ssl_conf);

    Additionally it is known some MSIE versions have also problems with particular ciphers. Unfortunately one cannot workaround these bugs only for those MSIE particular clients, because the ciphers are already used in the SSL handshake phase. So a MSIE-specific SetEnvIf doesn't work to solve these problems. Instead one has to do more drastic adjustments to the global parameters. But before you decide to do this, make sure your clients really have problems. If not, do not do this, because it affects all (!) your clients, i.e., also your non-MSIE clients.

    back to top

    Frequently Asked Questions – Webstar

    • What format do I need the certificates in to load them using Webstar V4?
    • What format do I need the certificates in to load them using Webstar V5?
    • Error: "bad unsupported format" when importing certificate.
    • Error: "Netscape cannot communicate securely with this server. No common encryption algorithms"


    What format do I need the certificates in to load them using Webstar V4?

    The certificates must be provided in a single chain file in Netscape format. Please request this from support@digi-sign.com [38]

    back to top

    What format do I need the certificates in to load them using Webstar V5?

    The certificates must be provided in a single text file in this order:

    The customer certificate
    Digi-SignClass3CA.cer
    GTECyberTrustRootCA.cer
    And there MUST be a blank line between

    -----END CERTIFICATE-----
    and
    -----BEGIN CERTIFICATE-----

    back to top

    Error: "bad unsupported format" when importing certificate

    This error happens when using the Certificate Extractor utility. If you do not use the extractor to import the certificate, it should work OK.

    back to top

    Error: "Netscape cannot communicate securely with this server. No common encryption algorithms"

    This error is a known bug in earlier versions of 4D Webstar Server Suite/SSL. You should upgrade to the latest version, and make sure all fixes and updates have been applied.

    If you are using the latest version, check that your SSL settings are correct. The server should be listening on Port 443 for SSL connections, and have the correct certificate and key file specified. Enable all ciphers. If you have not set up your server correctly for SSL, you may receive this error.

    back to top

    • Digi-SSL™

    Source URL: http://www2.digi-sign.com/support/digi-ssl

    Links:
    [1] http://www2.digi-sign.com/about/announcements/2048
    [2] http://www2.digi-sign.com/support/knowledgebase/digi-ssl
    [3] http://www2.digi-sign.com/user/login
    [4] http://www2.digi-sign.com/user/register
    [5] http://www2.digi-sign.com/digi-ssl
    [6] http://www2.digi-sign.com/en/node/add/forum/11
    [7] http://www.sun.com/hardware/serverappliances/documentation/manuals.html
    [8] http://www.digi-sign.com
    [9] http://www2.digi-sign.com/certificate+authority
    [10] http://www.company.com
    [11] http://www2.digi-sign.com/support/digi-ssl/Microsoft+iis+5+iis+6
    [12] http://www2.digi-sign.com/http
    [13] http://www.digi-sign.com/product/digi-ssl/
    [14] http://www2.digi-sign.com/digi-ca
    [15] http://www.yourdomain.com
    [16] http://www2.digi-sign.com/digital+certificate
    [17] http://www.yoursitename.com
    [18] mailto:sleuniss@yoursitename.com
    [19] http://www.domainname.com
    [20] https://hostname:port/Certificate
    [21] https://server:7002/certificate
    [22] https://www.digi-sign.com/downloads/download.php?id=aacd-digi-ssl-pdf
    [23] http://www2.digi-sign.com/download/certificate/UTN-USERFirst-Hardware.crt
    [24] http://www2.digi-sign.com/download/certificate/Digi-SignCADigi-SSLXs.crt
    [25] http://www2.digi-sign.com/download/certificate/Digi-SSLXsCA_Chain.pem
    [26] http://www2.digi-sign.com/download/certificate/Digi-SignCADigi-SSLXp.crt
    [27] http://www2.digi-sign.com/download/certificate/Digi-SSLXpCA_Chain.pem
    [28] http://www.digi-sign.com/support/digi-ssl/install%20certificate/index
    [29] http://www2.digi-sign.com/compliance/introduction
    [30] https://hostname.domain:
    [31] https://myhost.yoursitename.com
    [32] http://www2.digi-sign.com/support/digi-ssl/generate+csr
    [33] http://www.digi-sign.com/support/digi-ssl/install+certificate/index
    [34] http://support.microsoft.com/default.aspx?scid=kb;EN-US;q239875
    [35] http://support.microsoft.com/support/kb/articles/Q232/1/36.ASP
    [36] http://support.microsoft.com/support/kb/articles/Q232/1/37.ASP
    [37] http://support.microsoft.com/default.aspx?scid=kb;EN-US;q285821
    [38] mailto:support@digi-sign.com