
The following are the steps for issuing a Digi-ID™ Digital Signature:
The following are the steps for re-issuing/replacing an existing Digi-ID™ Digital Signature:
Typically the renewal process is simply a case of presenting the previous Digi-ID™ and a new one is issued to replace it

The Digi-CA™ [1] Certificate Authority [CA] system (that issues the Digi-ID™ end user digital signatures) can issue thousands of digital signatures every hour. This 'endless' capacity means that getting Digi-ID™ digital signatures to the end users can occur as quickly as your environment demands.
How the Digi-ID™ digital signatures are issued is set by the 'Enrolment Policy [2]'. The options within the Enrolment Policy are designed to be very flexible. They can be customised to meet almost any requirement with many different settings and combinations. The three basic options are:
Issuing the Digi-ID™ digital signatures is either a one or two stage process. Either the user receives an email inviting them to apply for their digital signature, or they are referred from an existing online site/system to the Digital Signature Application form.
However the user is prompted to get their digital signature, in the first stage, the Digi-CA™ Inviting 'action' requires the end user 'reaction' (completing an application form). In the second stage, the Digi-CA™ Approving 'action' requires the end user 'reaction' (activating the digital signature) and this completes the process. It is best understood as follows:
As stated, because the Enrolment Policy is very flexible, there are many different ways to invite and approve end users digital signatures. The following is a sample issuing process only. You may wish to include other options, as required.
Stage One 'Digi-CA™ Action' - Inviting Digi-ID™ Digital Signature Applications
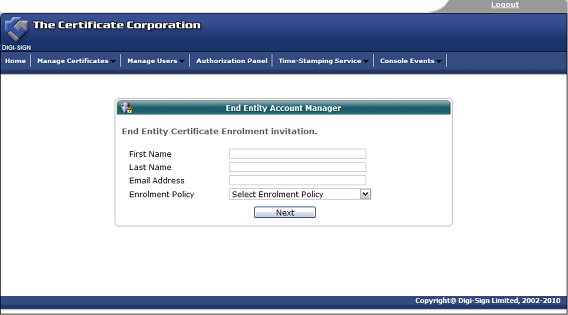
Using the Digi-CA™ RA Management Console interface, the Administrator uploads a .CSV batch file inviting [3] as many users as required.

Stage One 'User Reaction' - Completing Enrolment Form
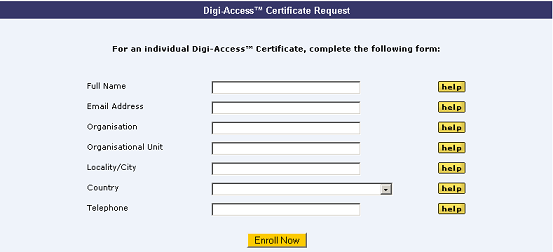
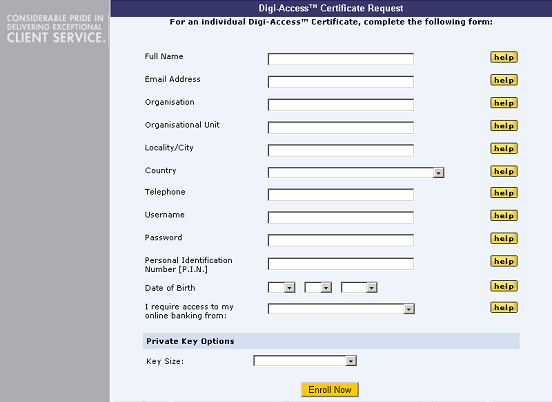
The Digi-CA™ system sends an email to each end user with a unique link to the Digi-ID™ digital signature enrolment form. Using the link provided in the email, the end user then completes the Digi-ID™ digital signature enrolment form.
Note:- this is the default Digi-ID™ End Entity Digital Signature Enrolment Form. This form uses basic HTML programming that can be altered [4] to match your specific design requirements.

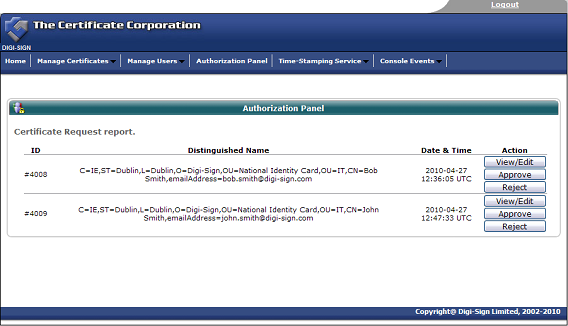
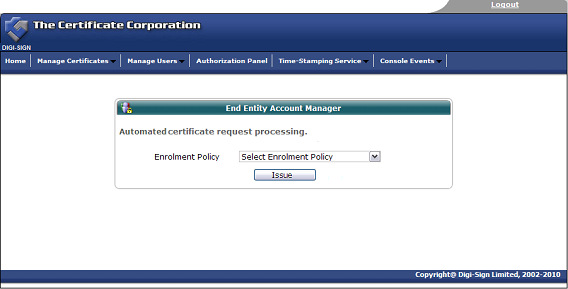
Once the end user completes all the fields and submits the enrolment form to the Digi-CA™ system, the Administrator is notified. The Administrator then approves [2] each end user application using the Digi-ID™ Digital Signature Authorization Panel.
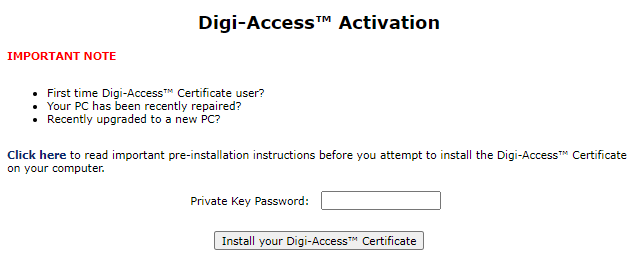
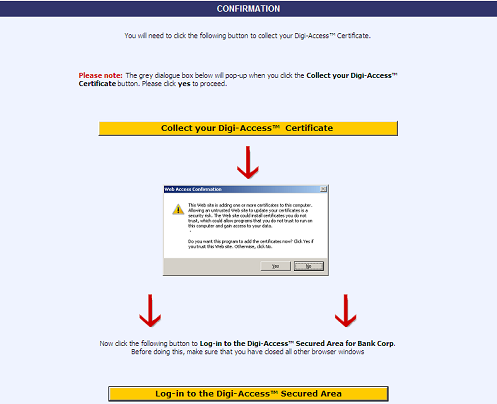
Stage Two 'User Reaction' - Activating the Digi-ID™ Digital Signature
Assuming the Administrator approves the application, the Digi-CA™ system sends a new email to the end user advising them that their application has been approved. Using the link provided in the email, the end user then activates [5] the Digi-ID™ digital signature and this completes the issuing process.
Once the enrolment form is completed and submitted by the end user, the Enrolment Policy enforces how the application is handled by the Digi-CA™ system. Learn more about the Enrolment Policy [2] options or browse the other pages below.
Once the invitation is issued, the end user must complete the enrolment form. View customised enrolment [4] forms or browse the other pages below.
The Enrolment Policy for Digi-ID™ controls the entire certificate issuing process. Enrolment Policy is set by the Certificate Policy [CP] for the Digi-CA™. This is a specialist subject and requires experienced knowledge of Certificate Authority [CA] systems and Public Key Infrastructure [PKI]. Keeping this complex topic simple, there are three basic options for Enrolment Policy:

Once the enrolment form is completed and submitted by the end user, the Enrolment Policy enforces how the application is handled by the Digi-CA™ system. Learn more about the Enrolment Policy [2] options or browse the other pages below.

|
Microsoft® Internet Explorer® |
Mozilla/Firefox/Safari |
|
1. To view your Digi-ID™ digital signature in Microsoft® Internet Explorer®, use the Tools menu (you may have to press the 'Alt' button on your keyboard to view this menu) and then select Internet Options 2. In the Internet Options dialog box, select the Content tab and then click the Certificates button 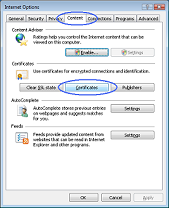 3. In the Certificates dialog box, select the certificate/digital signature you wish to examine and then click the View button 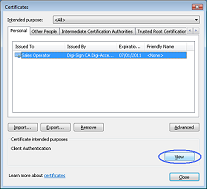 4. The chosen digital signature will be displayed where you will be able to see:
 |
1. To view your Digi-ID™ digital signature in Mozilla, Firefox or Safari, use the Tools menu and then select Options 2. In the Options dialog box, select the Encryption tab and then click the View Certificates button 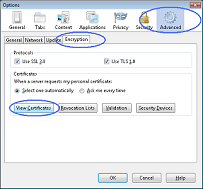 3. In the Certificate Manager dialog box, select the certificate/digital signature you wish to examine and then click the View button  4. The chosen digital signature will be displayed where you will be able to see:
 |

|
Microsoft® Internet Explorer® |
Mozilla Firefox |
|
|
1. To view your Digi-ID™ digital signature in Microsoft® Internet Explorer®, use the Tools menu (you may have to press the 'Alt' button on your keyboard to view this menu) and then select Internet Options 2. In the Internet Options dialog box, select the Content tab and then click the Certificates button 3. In the Certificates dialog box, select the certificate/digital signature you wish to examine and then click the View button 4. The chosen digital signature will be displayed where you will be able to see:
5. Once you have viewed and confirmed this is the Digi-ID™ digital signature you wish to remove, return to the Certificates dialog box, select the certificate/digital signature and click the Remove button |
1. To view your Digi-ID™ digital signature in Mozilla Firefox, use the Tools menu and then select Options 2. In the Options dialog box, select the Encryption tab and then click the View Certificates button 3. In the Certificate Manager dialog box, select the certificate/digital signature you wish to examine and then click the View button 4. The chosen certificate/digital signature will be displayed where you will be able to see:
5. Once you have viewed and confirmed this is the Digi-ID™ digital signature you wish to delete, return to the Certificate Manager dialog box, select the digital signature and click the Delete button |
Links:
[1] http://www2.digi-sign.com/digi-ca
[2] http://www2.digi-sign.com/digi-id/distribute/policy
[3] http://www2.digi-sign.com/digi-id/distribute/invite
[4] http://www2.digi-sign.com/digi-id/distribute/enrol
[5] http://www2.digi-sign.com/digi-id/distribute/activate