There are three demonstrations for Digi-Access™. Read the sections below to learn more about this two factor authentication technology and to help complete your understanding of why Digi-Access™ is your best and simplest, online security solution.
| |
|
|
|
| 1. |
Understanding the Digi-Access™ Demonstration |
| |
|
|
|
| 1.1 |
Show how Digi-Access™ works ‘live’ |
|
The live and interactive demonstrations of Digi-Access™ are excellent tools to help you complete your understanding of this identification and authentication solution. The demonstrations actually show you Digi-Access™ ‘in action’
|
| |
|
|
|
| 2. |
What You Will Learn from the Digi-Access™ Demonstration |
| |
|
|
|
| 2.1 |
Person’s actual identity is fully checked |
|
Before a Digi-Access™ certificate is issued to any person, the ‘real world’ physical identity of that person is first validated and verified to ensure they are who they claim to be. In the demonstration, this does not occur, but would normally
|
| |
|
|
|
| 2.2 |
Digitally bound identity |
|
The Digi-Access™ certificate mathematically binds the person’s physical identity into the code that is used to create it. It is this bound identity that provides the assurance that protects who can access the specific online system or site
|
| |
|
|
|
| 2.3 |
Unique identity cannot be copied or shared |
|
Once issued, the Digi-Access™ certificate is unique and cannot be copied or shared with other people. Users may be able to share usernames and passwords, they can even share devices such as One-Time-Password [OTP] token, but users cannot share a Digi-Access™ certificate
|
| |
|
|
|
| 3. |
Where to See the Interactive ‘Live Demonstrations’ |
| |
|
|
|
| 3.1 |
Here |
|
http://www.digi-sign.com/demos/digi-access
|
| |
|
|
|
| 4. |
Digi-Access™ Demonstration Step-by-Step Instructions |
| |
|
|
|
| 4.1 |
Step 1 – Request Certificate |
|
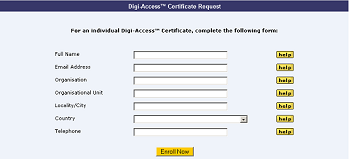
Go to the above URL for the see the Certificate Request form and once you are ready to request your certificate, it is critical that you complete this form correctly
|
| |
|
|
|
| |
 |
| |
|
|
|
| 4.2 |
Step 2 – Order confirmation |
|
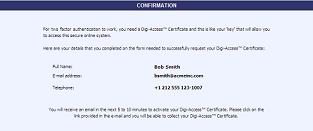
This is a simple confirmation of the submitted Certificate Request form
|
| |
|
|
|
| |
|
|
|
| |
|
|
|
| 4.3 |
Step 3 – Activate Certificate |
|
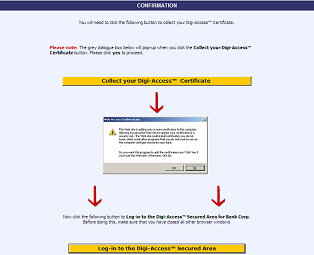
After some time you will receive an email confirming your certificate is ready for collection. Simply click the URL provided in this email to complete the certificate activation
|
| |
|
|
|
| |
 |
| |
|
|
|
| 4.3 |
Step 4 – Test the newly secured login |
|
Now you can simply click the button at the bottom of the Confirmation screen to see use the Digi-Access™ certificate to log into the secured location using Digi-Access™ two factor authentication
|
| |
|
|
|
| |
 |
| |
|
|
|
| |
|
|
|
| 5. |
Important Things To Do Once You’ve Completed the Demonstration |
| |
|
|
|
| 5.1 |
View the test Digi-Access™ certificate |
|
Depending on your operating system and browser version, you can view your Digi-Access™ two factor authentication certificate using these instructions
|
| |
|
|
|
| 5.2 |
Delete the test Digi-Access™ certificate |
|
It is good practice to remove unwanted, or test, certificates from your computer. To remove the demonstration test Digi-Access™ certificate from your computer, choose the browser you are using and follow these steps |
| |
|
|
|


